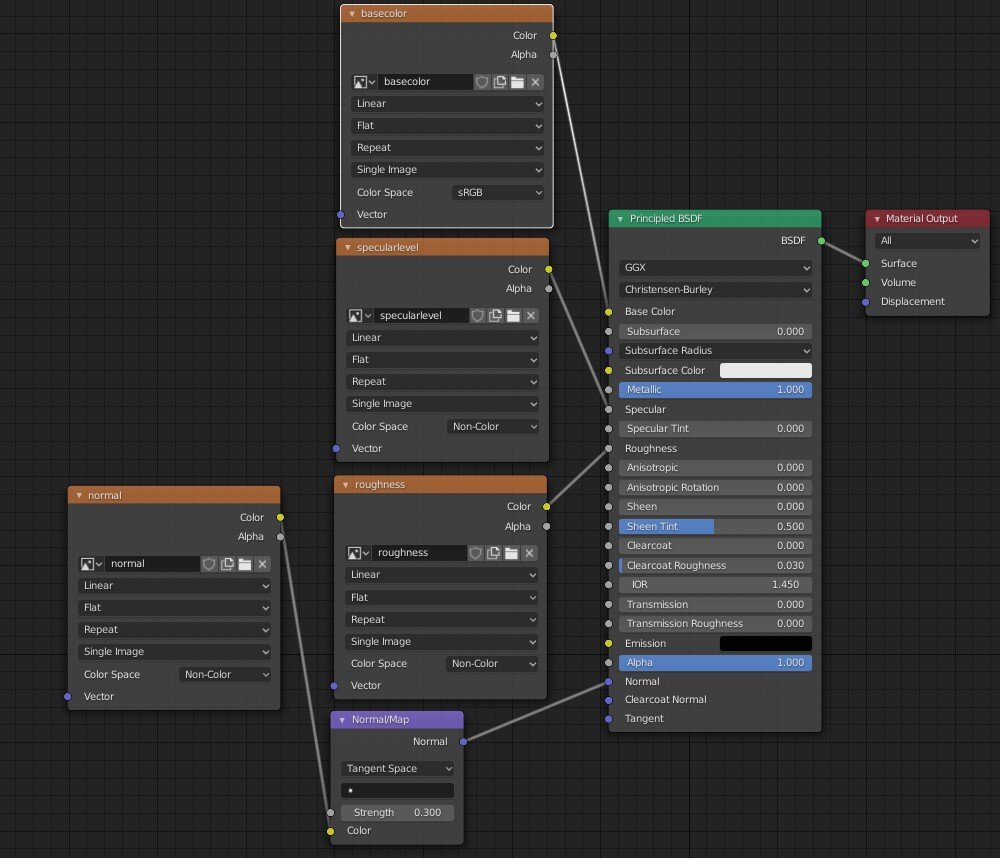
Im often exporting models from 3dsmax to Blender and this is a fast way to import the models so that the material is automatically converted and imported into Blender with PBR materials applied with correct default settings.
What does it do?
It takes a Vray Material with Roughness workflow, converts it to Standard (Legacy) material and is ready for export to FBX. You can extend on the script or modify it for your needs. This is the workflow:
Blender to GLB/GLTF for real-time:
A secondary benefit to this workflow is that once the file is imported into Blender as FBX it can be directly exported to GLB/GLTF for real-time workflow. If you want to include ambient occlusion you will have to do this manually for now. I might create a script in future, no promises on that one since its usually very simple with two additional nodes in the shader editor as shown in the Blender manual.
Converts:
Diffuse texture, Diffuse Color, VrayColor in Diffuse
Roughness texture
Metal texture
Opacity texture
Normal texture
Normal DirectX to OpenGL (3dsmax uses DirectX & Blender uses OpenGL, its done via naming convention – Optional)
Sets the correct Specular level for Blender
Sets Reflection to White
Sets Dielectric or Metallic material for Blender (depending on if Metal texture is used)
Sets Gamma settings for sRGB and Linear images
Can convert VrayMtl, Vray2SidedMtl, Multi-Material. You can edit the functions in the script to add more material types if you use them
Export Options in FBX:
Comparisons:
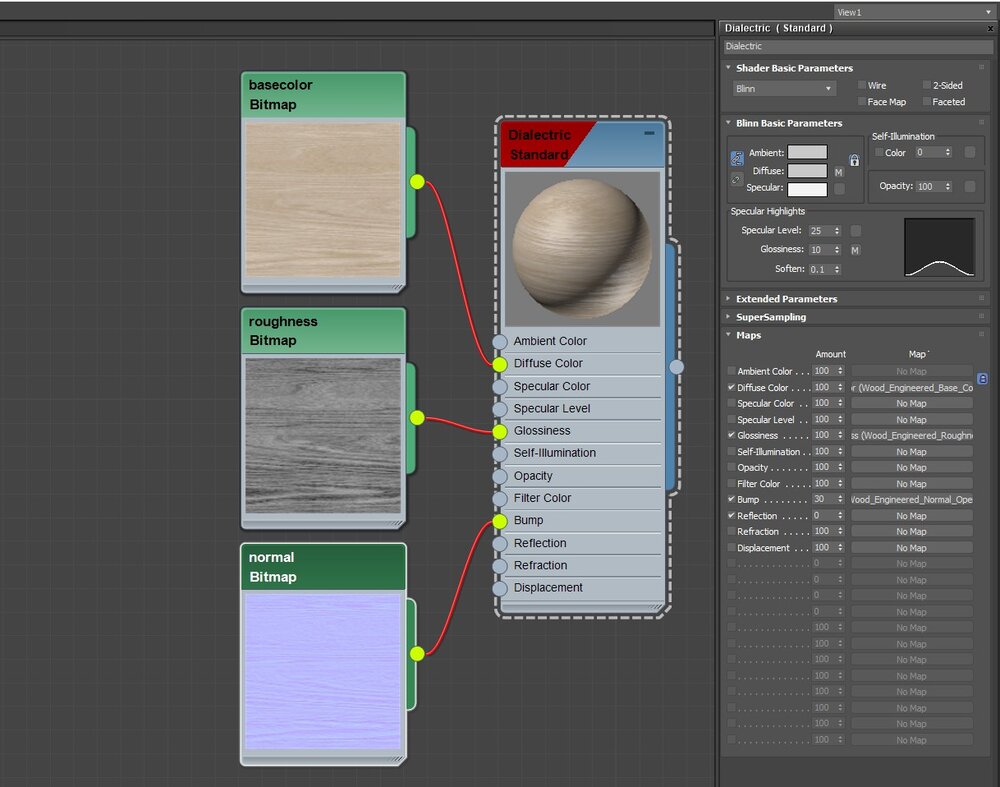
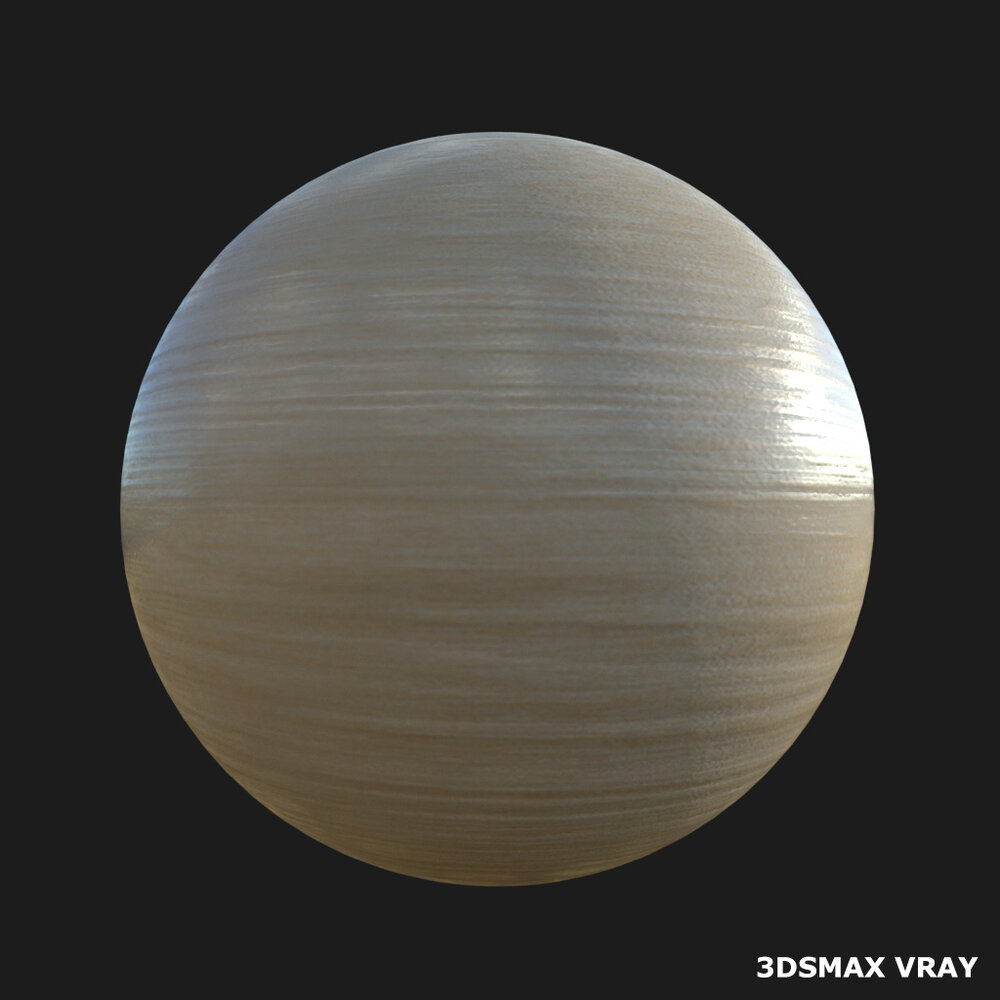
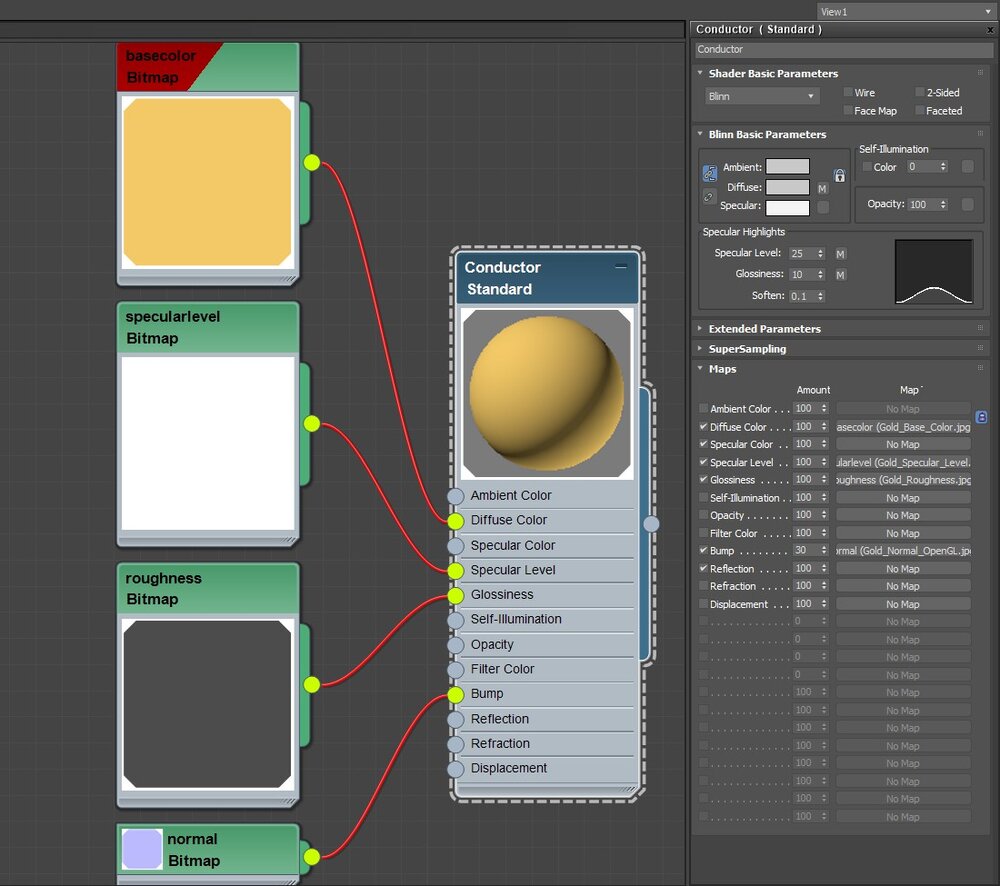
3dsmax Vray Roughess Material:
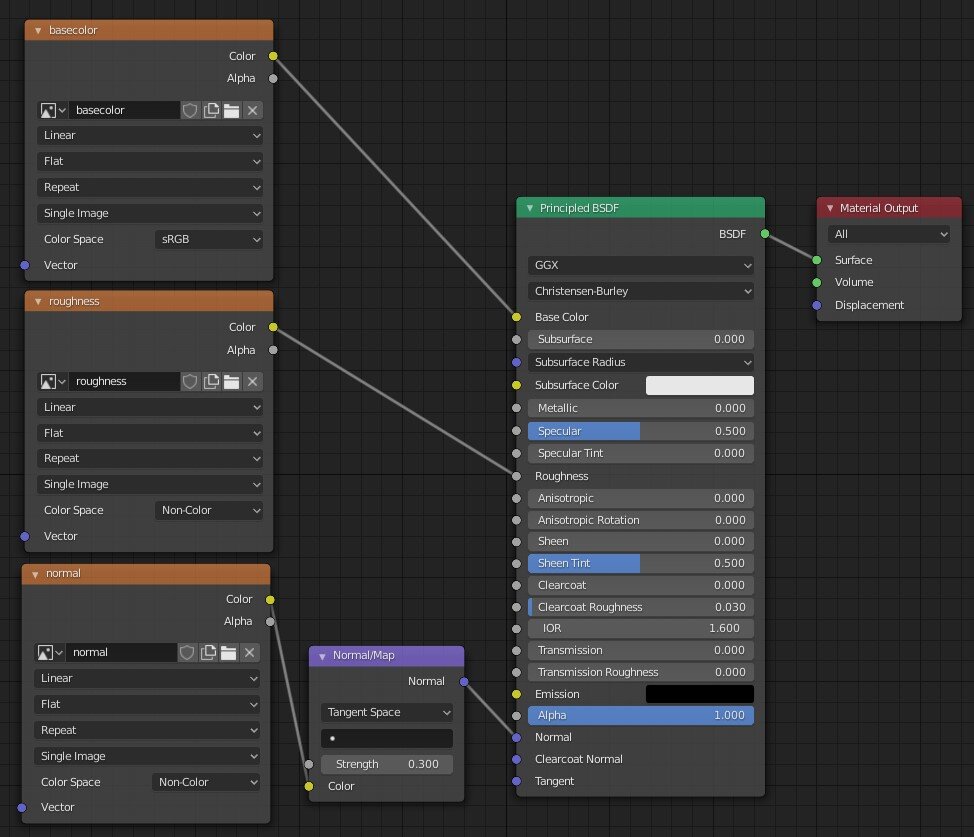
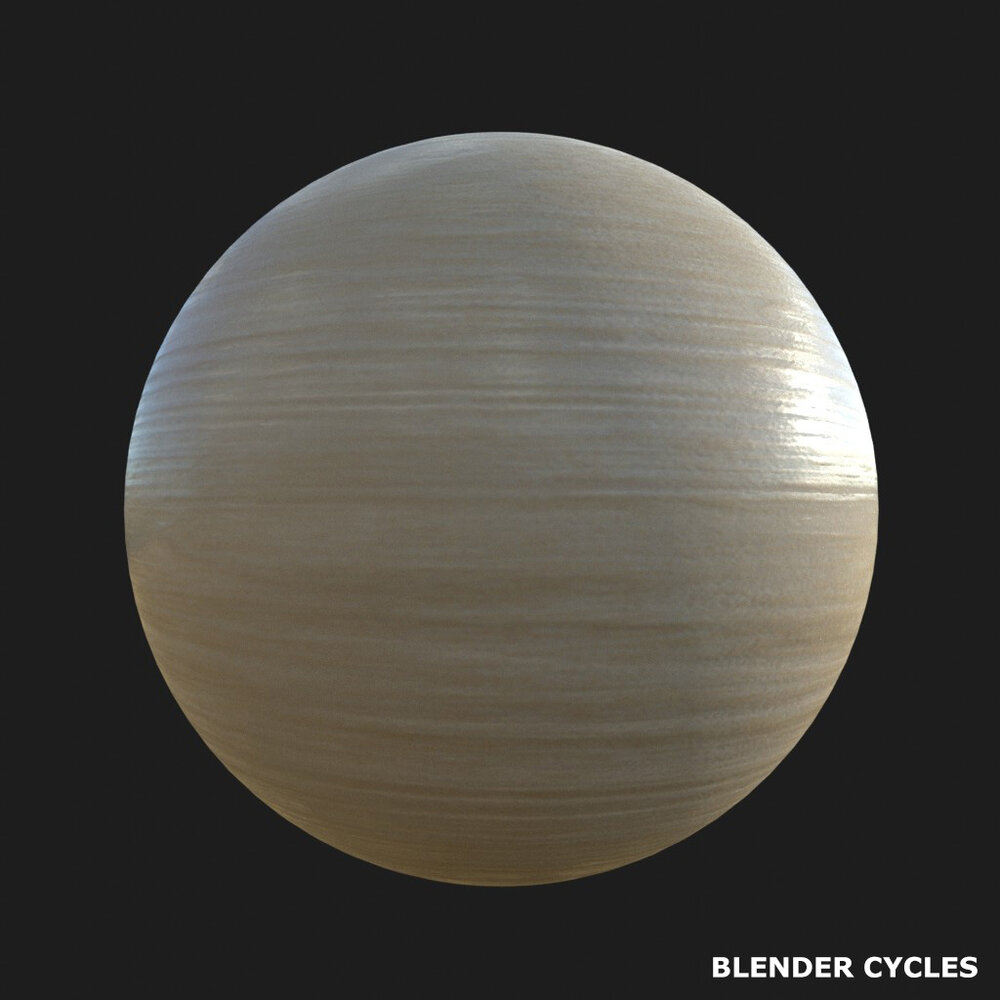
Standard (Legacy) Material – Converted with Script
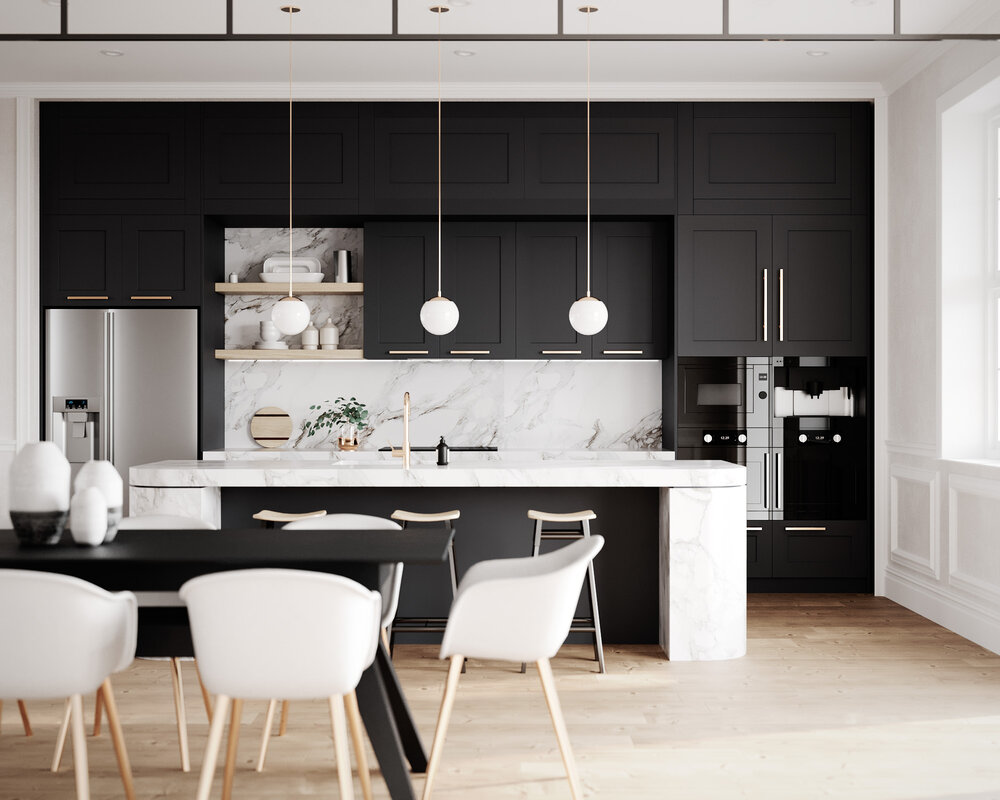
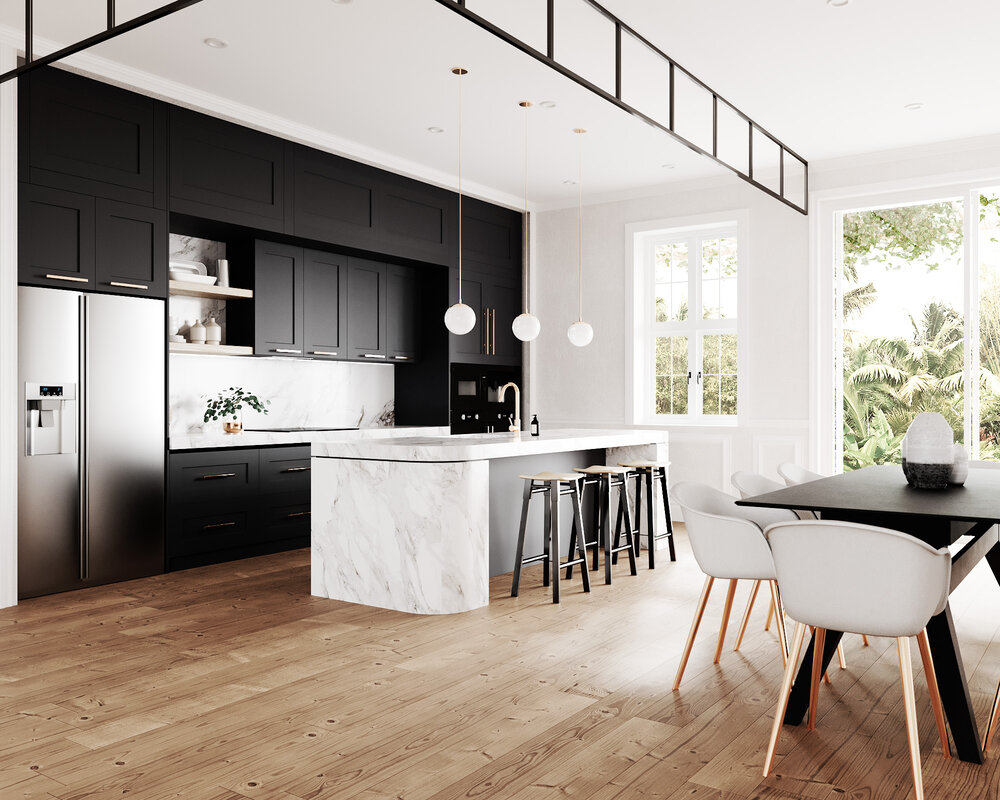
The house is inspired by traditional English Contemporary design juxtaposed in a tropical environment.
The goal was to utilize the high quality materials and fittings and introduce some modern elements such as the interior glass panels as well as bring in as much natural light as possible.
Design
The high quality materials such as the floorboards, marble and gold fittings had to be balanced against the exterior elements. This created a simple color palette of Gold, Black and Green. The timber finish for the floor also brings in the natural elements from the exterior such as the timber awning and natural lush.
The purple and yellow hues from Katarina’s painting on the wall was a useful way to break up the two areas of the house and also an opportunity to use a nice colorful element such as the Zebra plant. The use of the gold fittings and ceiling elements highlights the tall 3 meter ceilings and spacious kitchen cabinets.
Process
The interior design and paintings were provided by Katarina Kondelova, who I highly recommend for any 3D artists who need an extra eye on their projects.
I took a lot of inspiration from Kaylen Flugel Design and Mowery Marsh Architects as they had some similar color palette and design’s from their past projects which helped with some of the details of the image.
The background photography was sourced from Unsplash by the artists Cody Board and Ralph Kayden.
The Zebra plant textures were shot on my Canon 5D and color corrected using an x-rite Macbeth chart. These were put through the PBR process using Bitmap2PBR which takes only a few seconds to output all the necessary maps for 3D.
The statues and sea shell on the books were provided by Oliver Laric. These are Photogrammetry models, for those unfamiliar these are photos taken from many different angles which create a point cloud image which can be then turned into 3D geometry/mesh. These are also available to download from his website linked in the credits below.
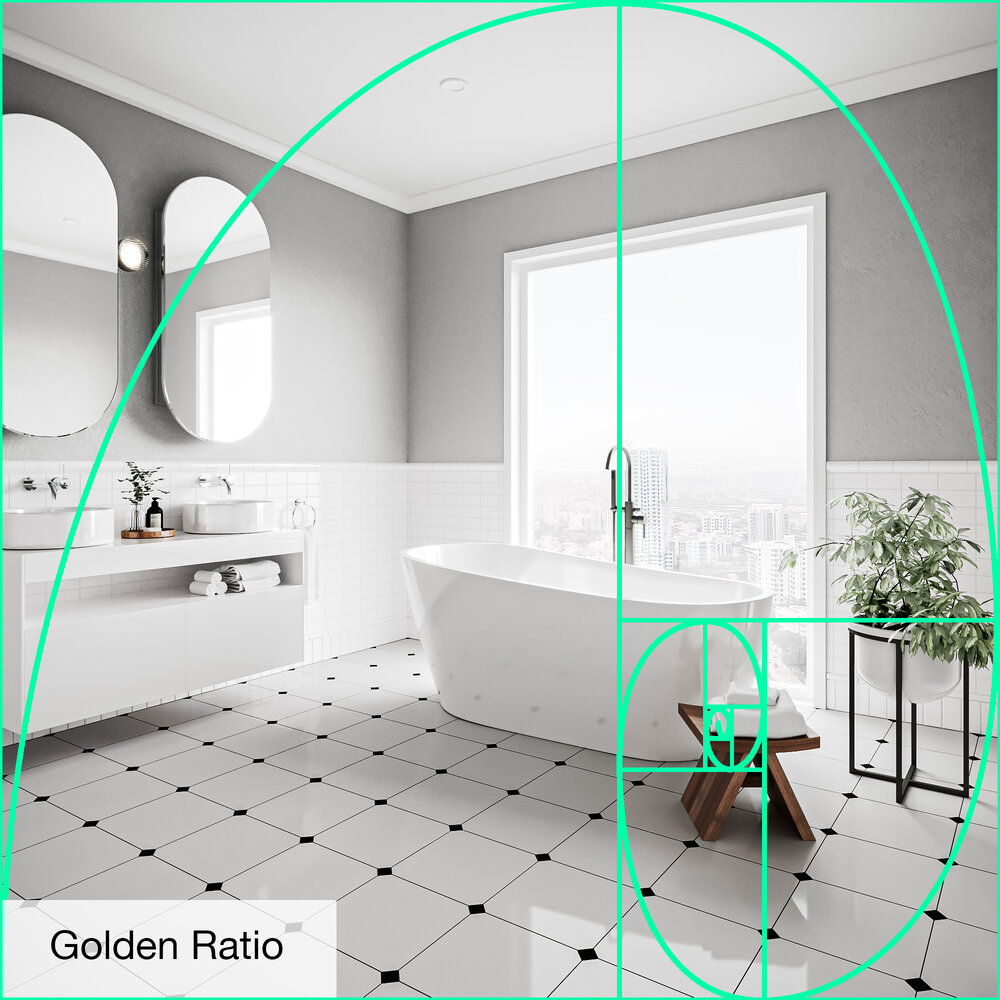
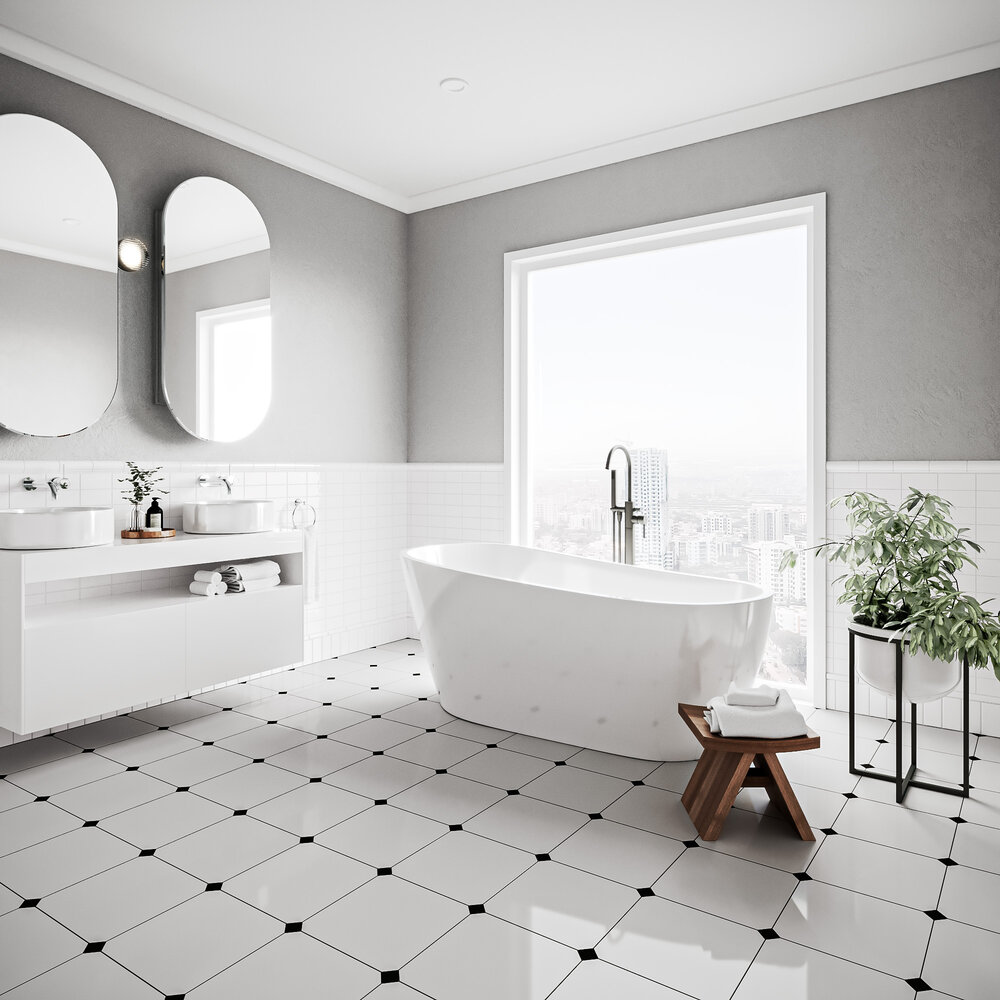
All images are balanced using traditional composition methods such as Rule of Thirds, Phi Grids and the Golden Spiral. You can see my previous project which goes into more depth on this subject.
The scene is also available for download for 3dsmax/Corona here. It is completely royalty free, you can reuse parts of it or use it entirely for any purpose. You can learn from the scene; how the lights are set up, cameras, depth of field, lightmix, tonemapping, materials, textures and post production files all included.
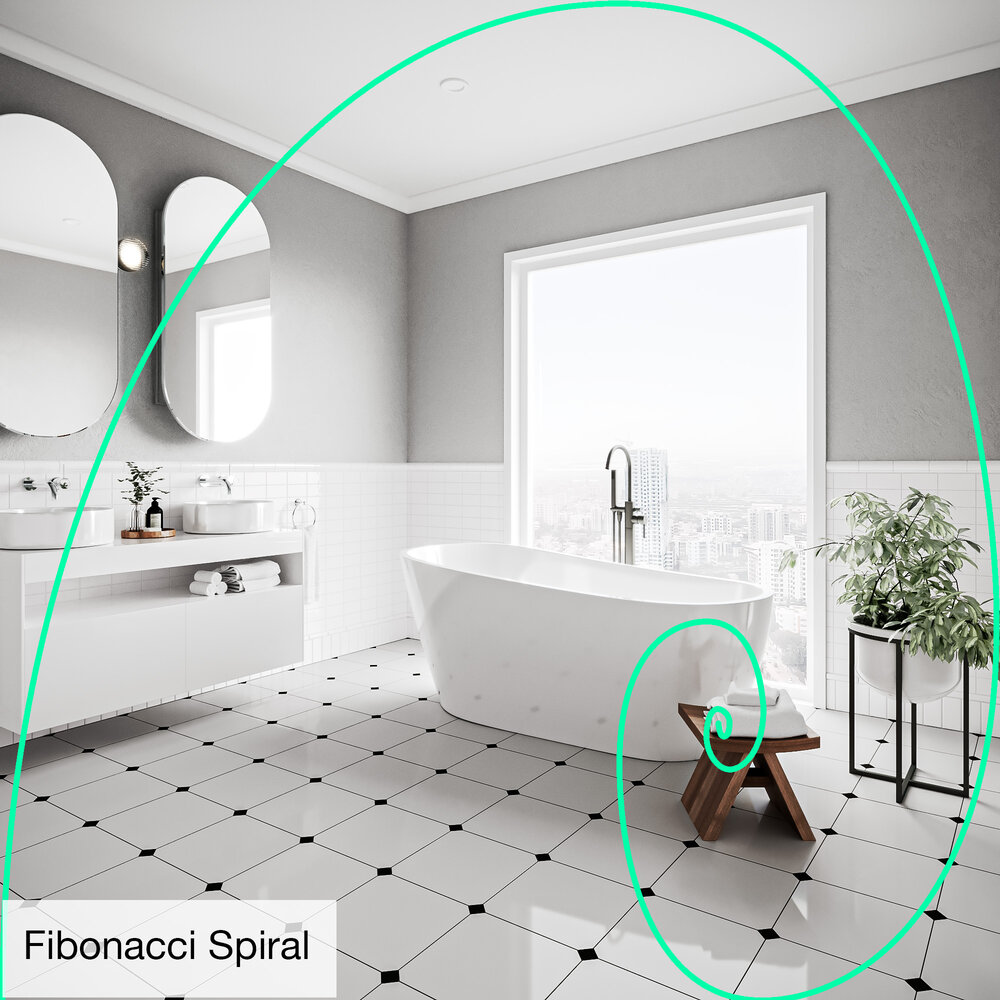
The ratio of 1:1.618 is a quadratic solution. It has many names, some of which you will see in the following images such as the Fibonacci Ratio and the Golden Mean. As most artists know this design aesthetic is most commonly found in plants, planet orbits, bone structures and often used in Renaissance Art.
In this particular set I am using it to draw attention from the left side of the image to the bottom right taking the eye on a journey around the window. It can seem a bit daunting at first compared to using a typical rule-of-thirds grid but its always fun to experiment when the opportunity arises.
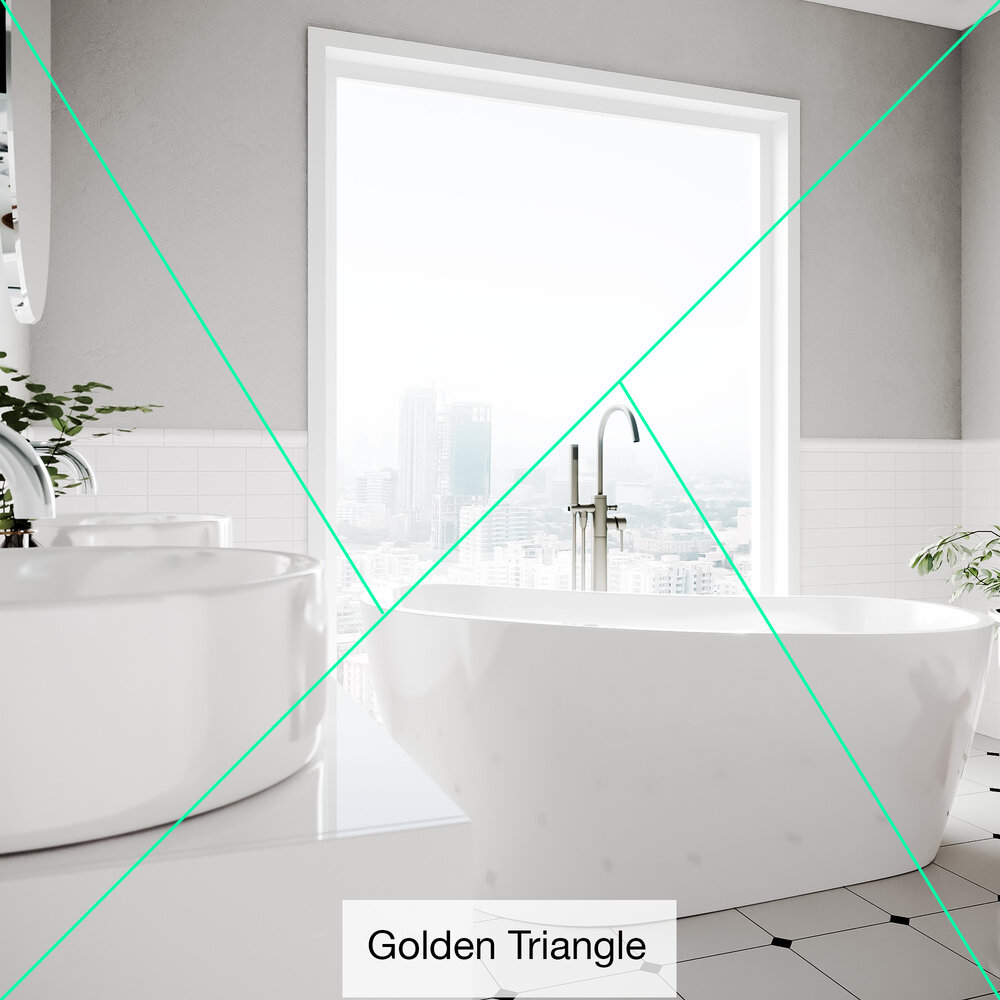
The Golden Triangle
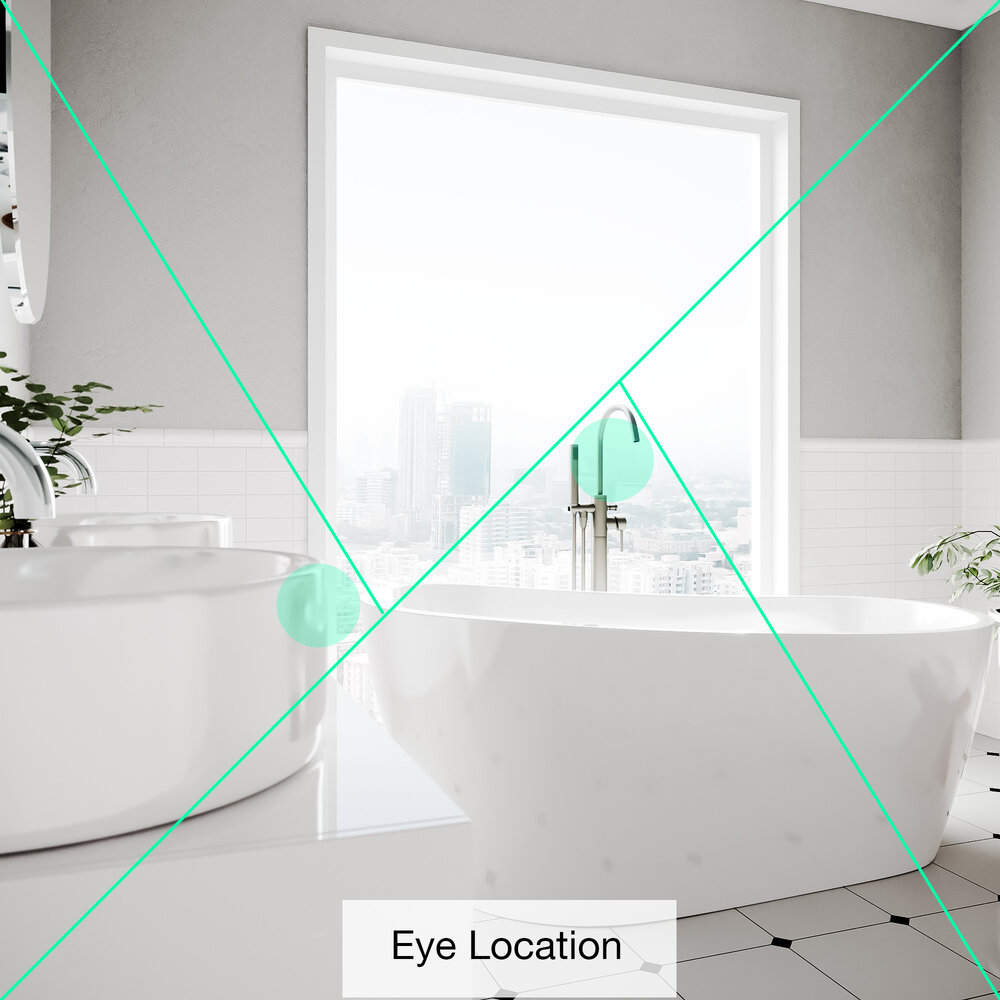
There is no hard and fast rule with this one other than understanding that the two points which are highlighted in the center are where the eyes go first. It can often be used for balancing outdoor elements such as bridges or mountains to create an interesting effect or draw your eye to a specific location first. In this case the edge of the tapware and edge of the basin and window.
It can also be incorporated with other compositional elements when given the chance such as the Phi Grid (more on this in the next post). You can see good use of this method in the works by Frans Snyders.
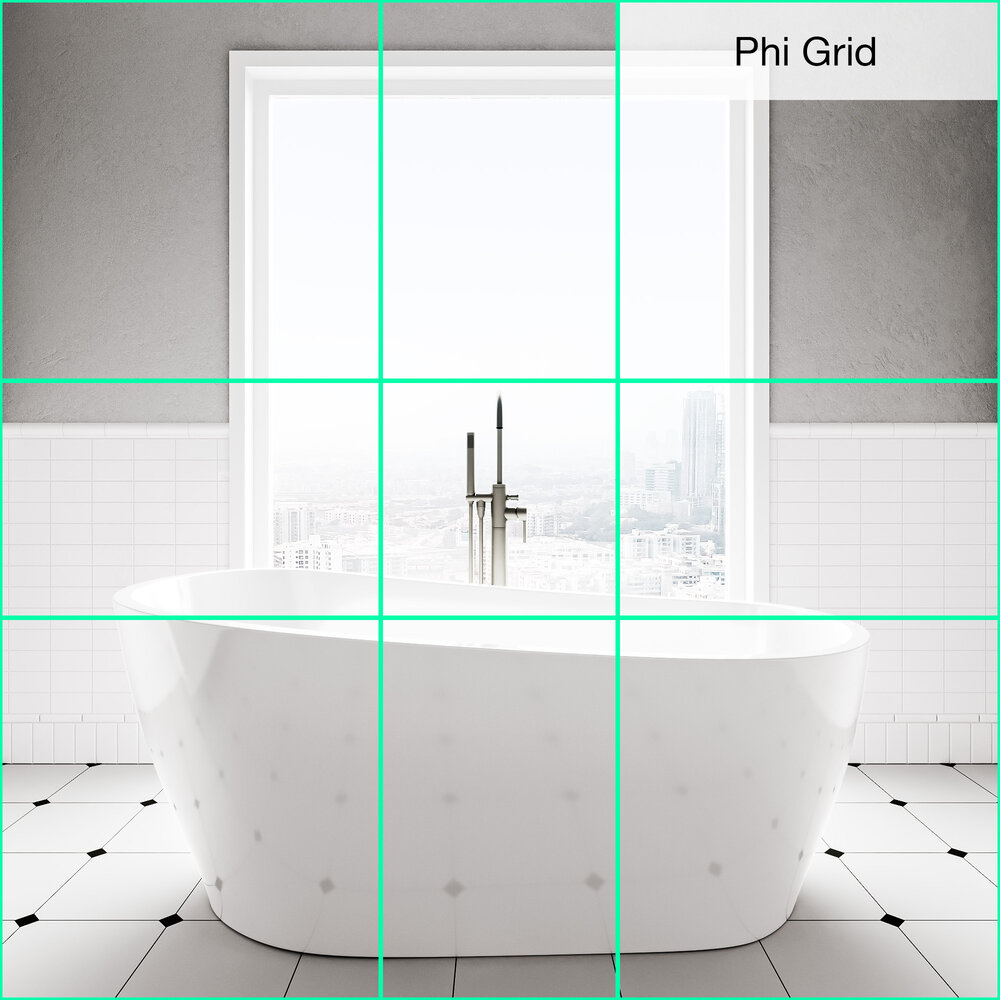
The Phi Grid
Not to be confused with the rule-of-thirds, the two center lines are usually closer together representing the ratio of 1:1.618 when one of those lines are removed. You can see this more clearly in the image labelled Divine Ratio where the most important information is in the lower portion. Remember you can do this vertically as well, it’s a versatile tool. Davinci’s famous “The Last Supper” shows how this can be used effectively. He also influenced many great artists with his mathematical and artistic skills.
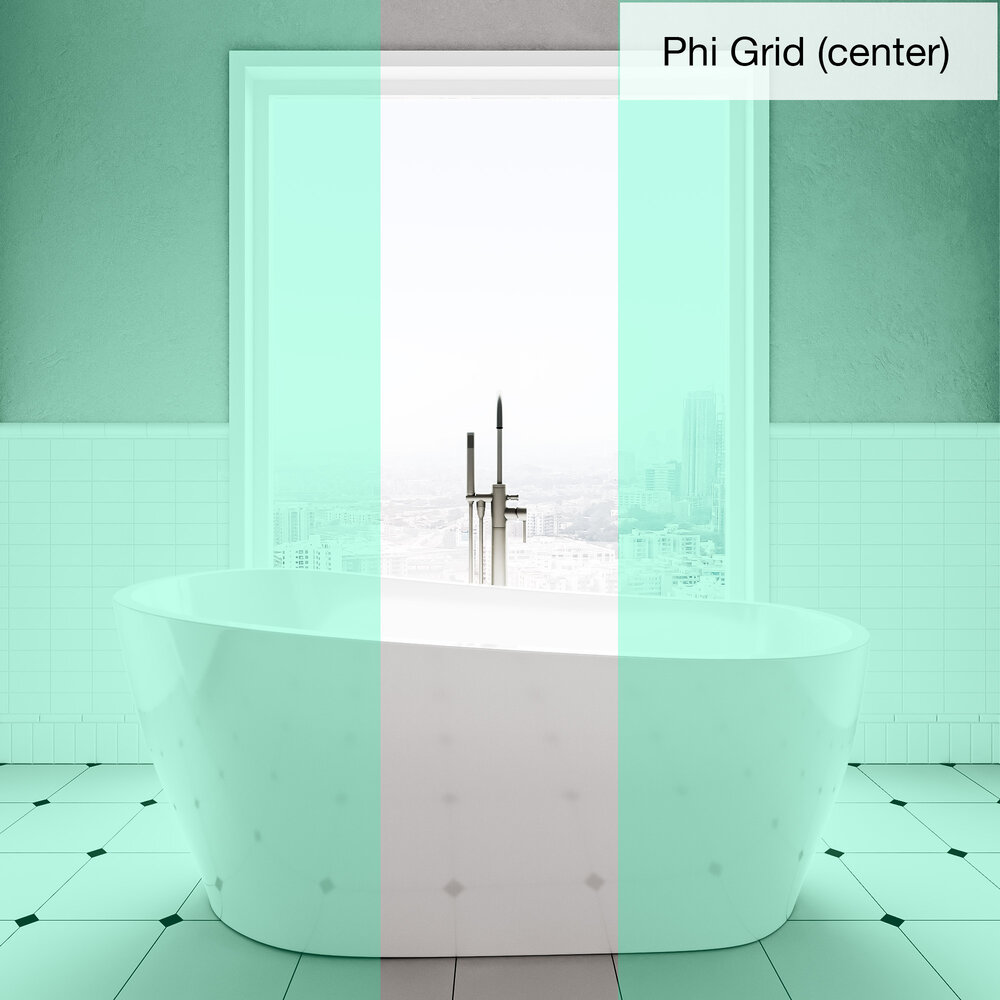
In the Phi (center) image I have used those centerlines to denote the feature element of the image in this case the tapware for the bathtub. Using the center is used in portrait photography.
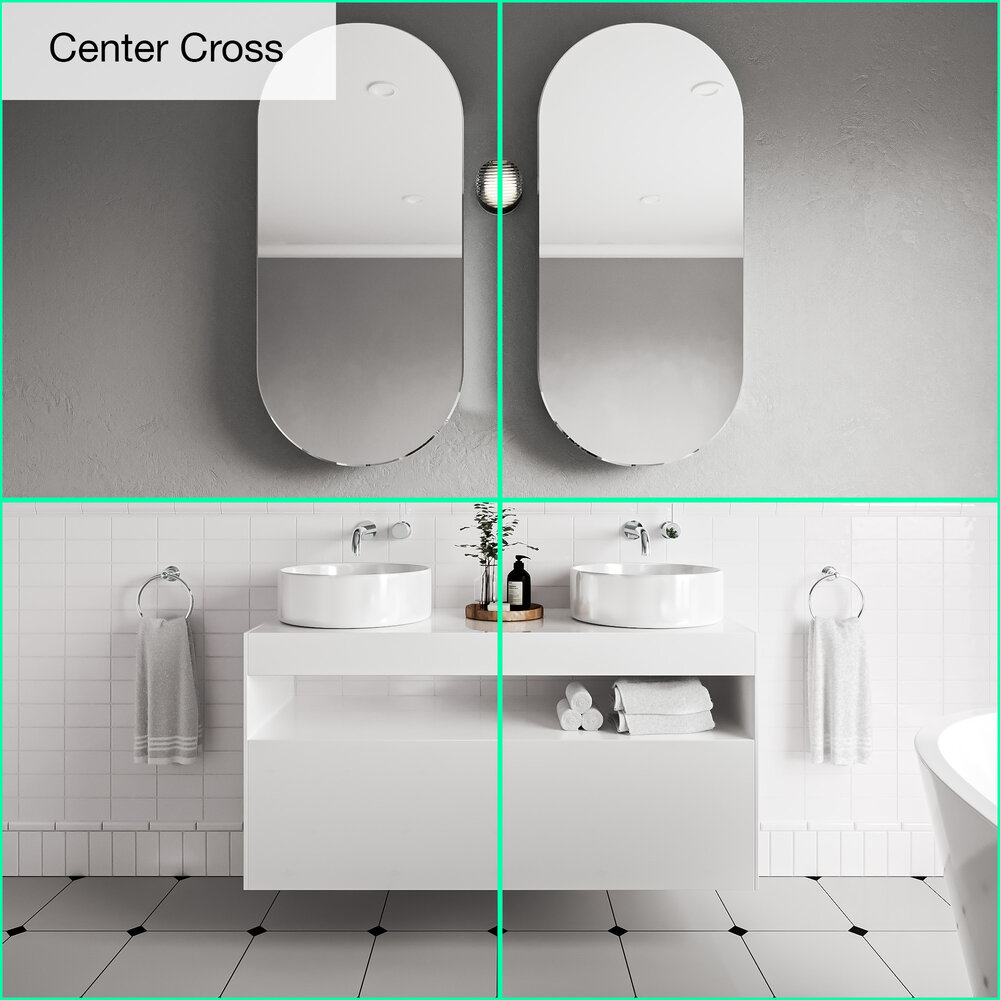
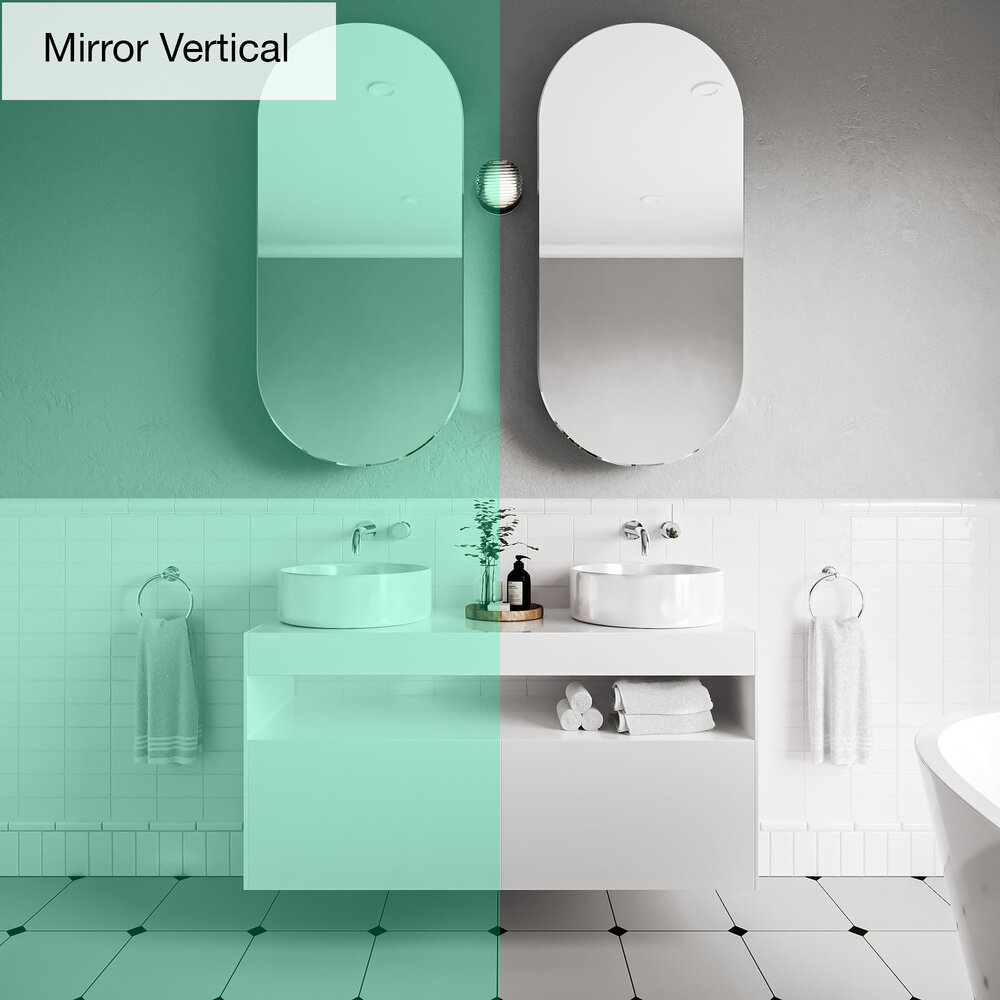
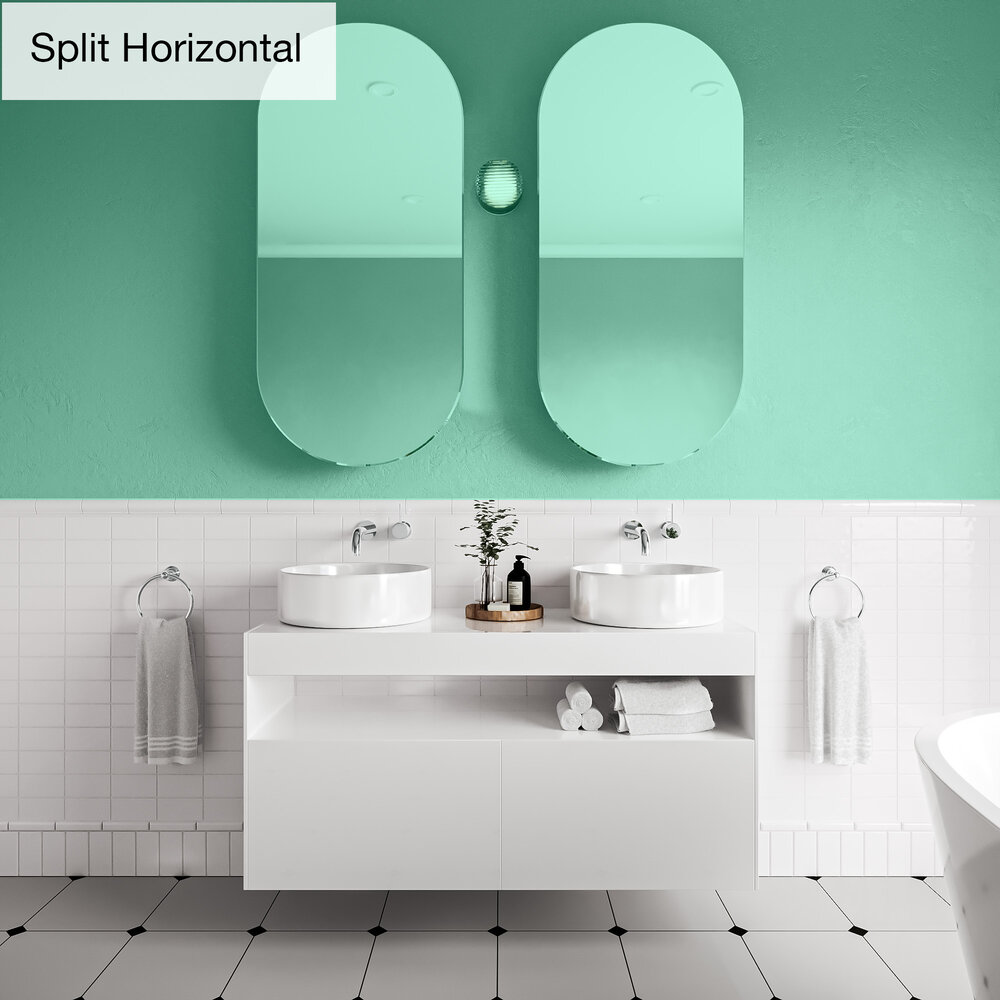
The Center Cross
The Center Cross can be powerful when used in architecture, especially when you have mirrored elements such as the towels, basins and mirrors in this case. This is prevalent in the Mirror Vertical image. In the Split Horizontal image, having the wall element separated in the center we can highlight the lower half of the image with more detail and keeping the top half simplified.
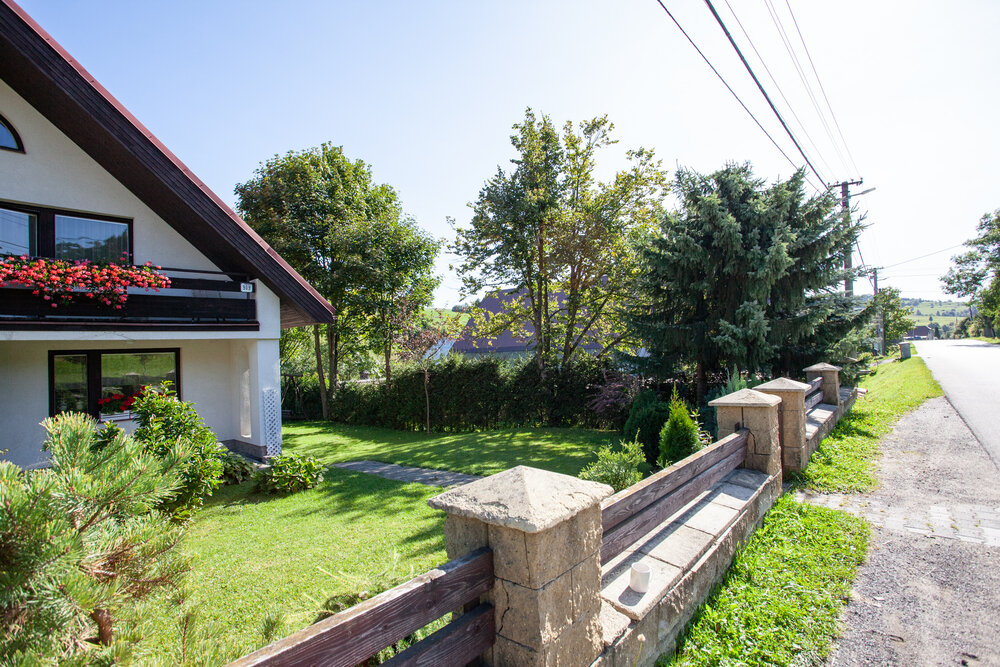
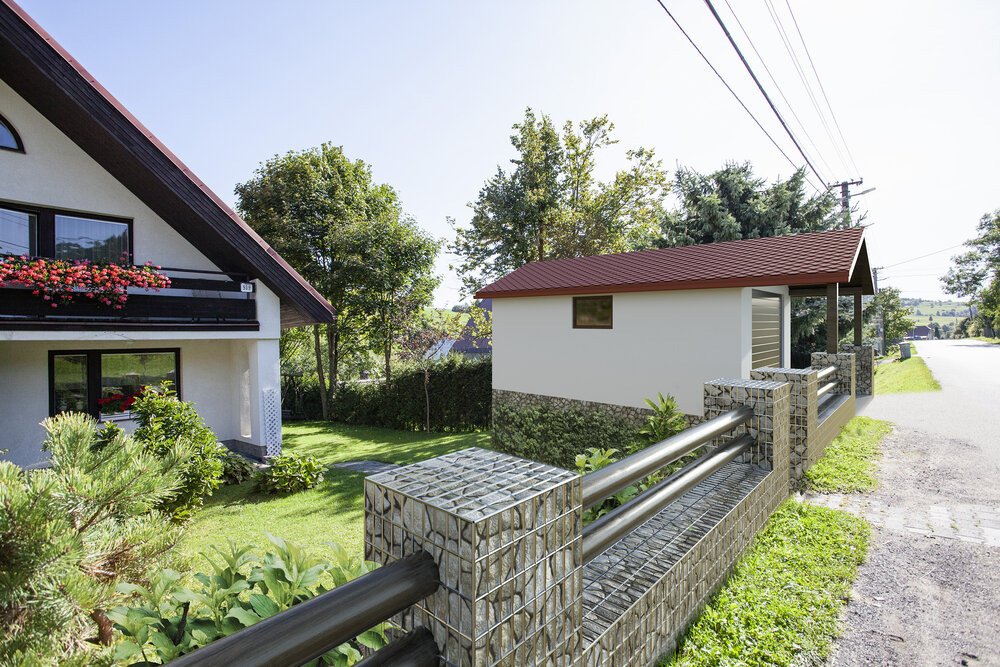
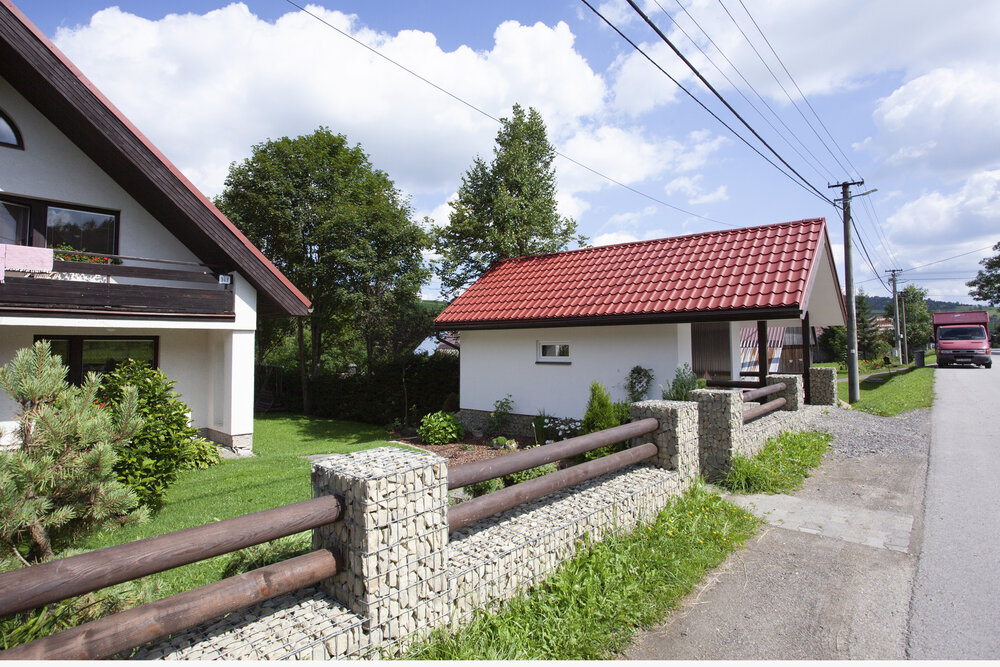
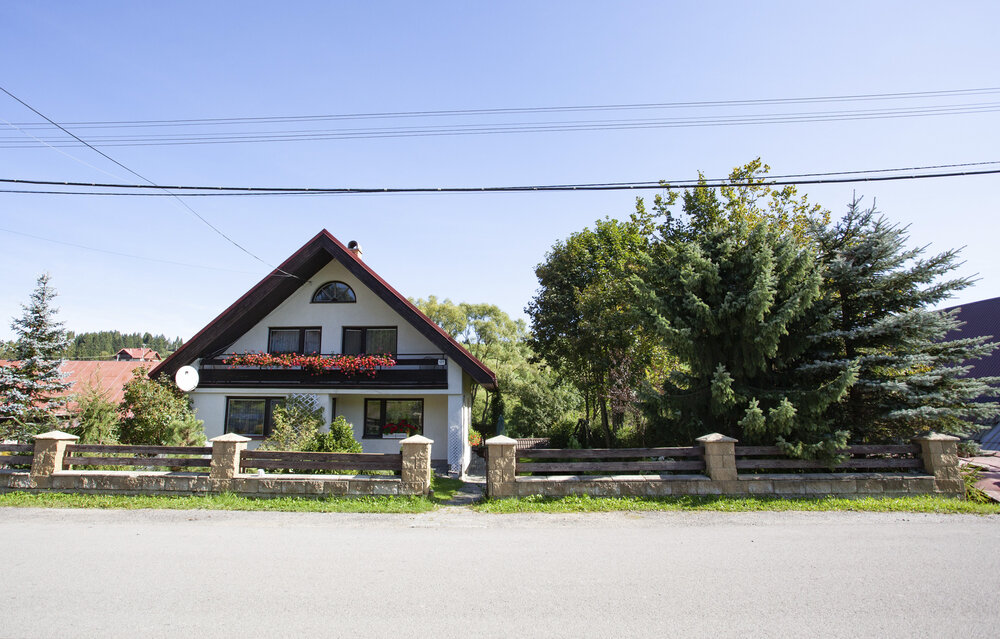
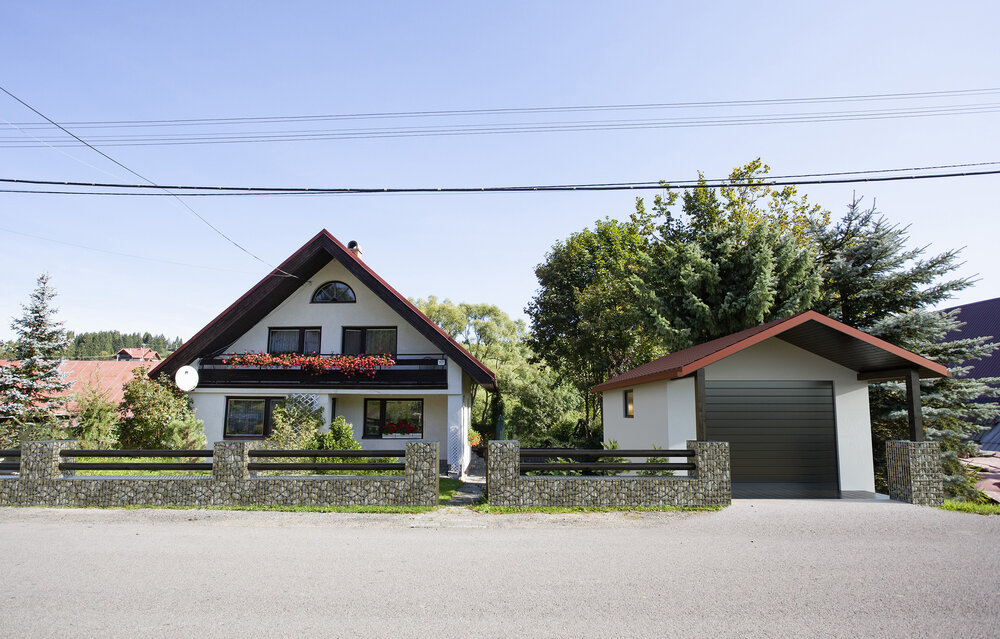
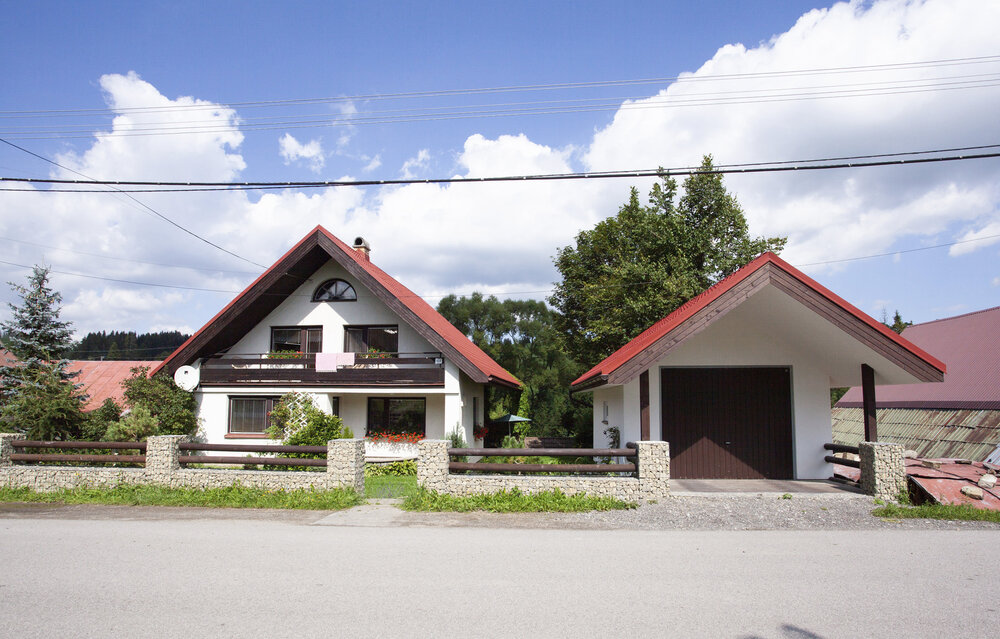
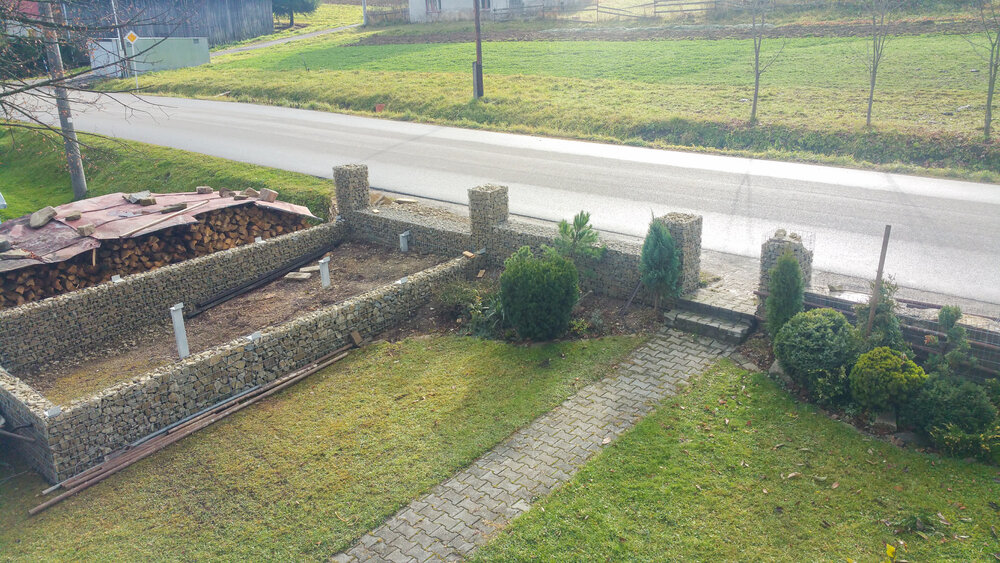
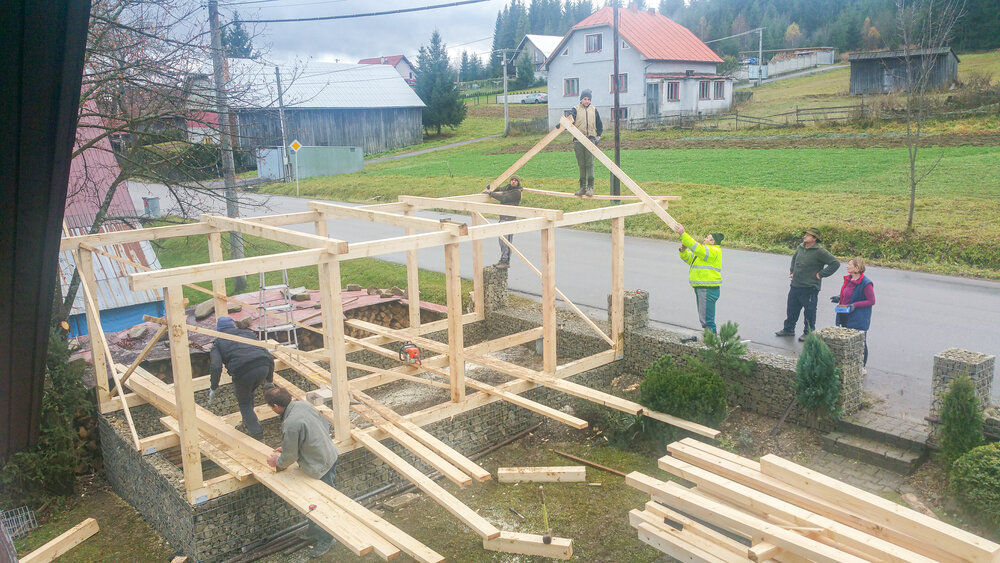
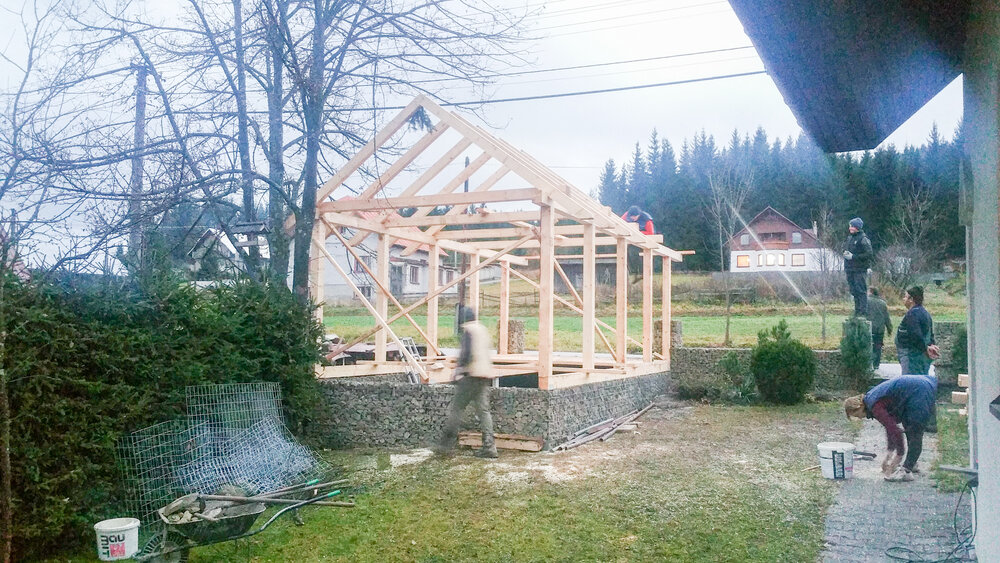
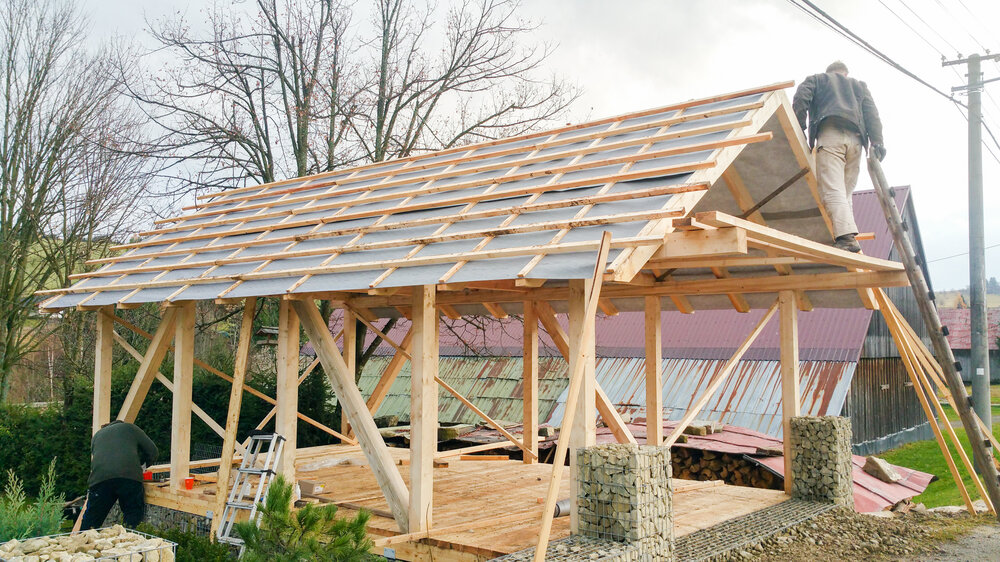
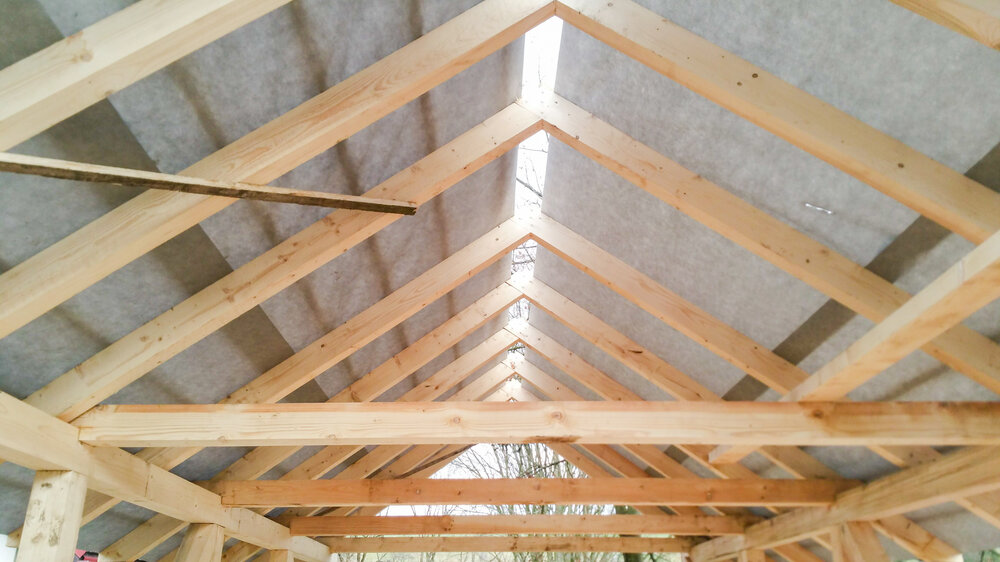
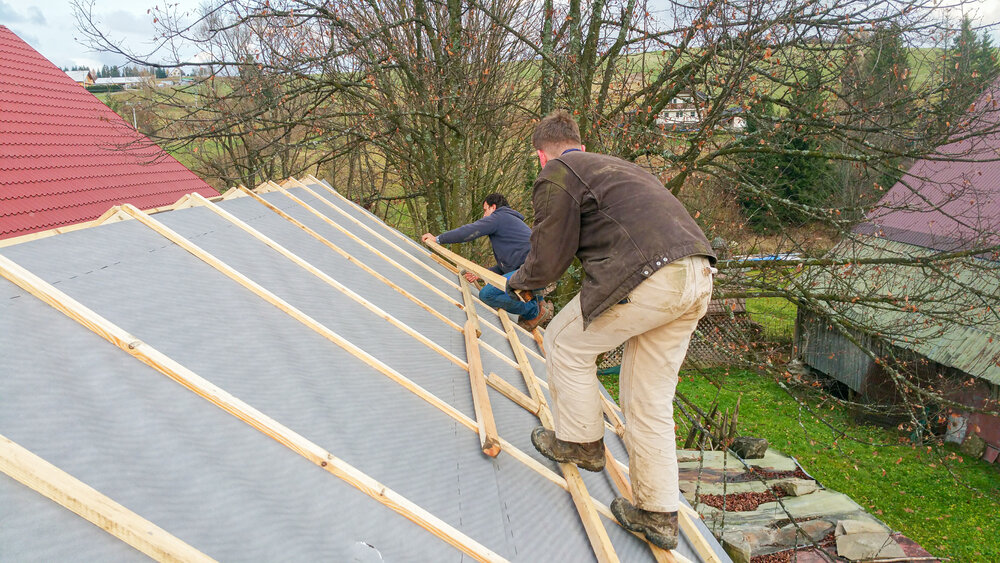
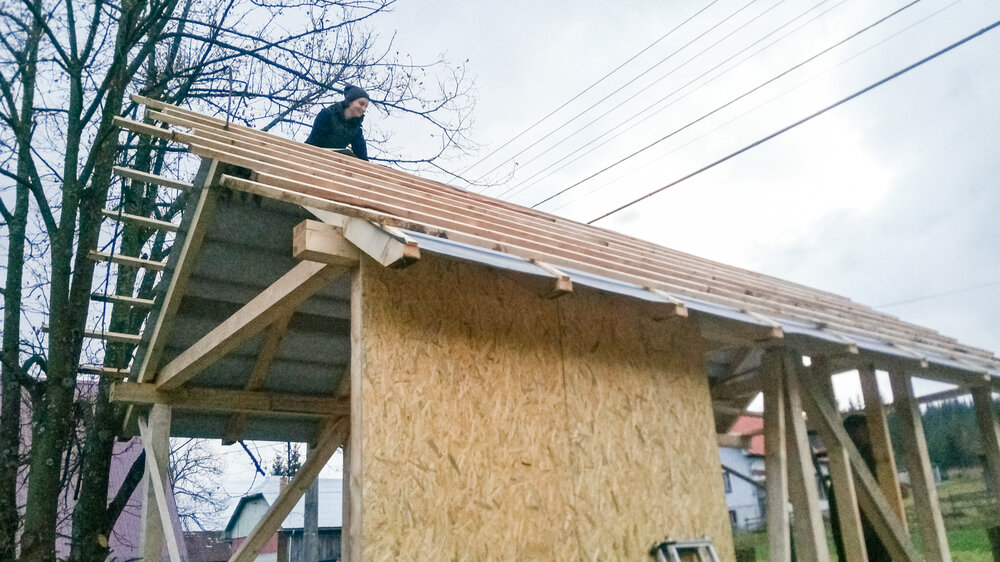
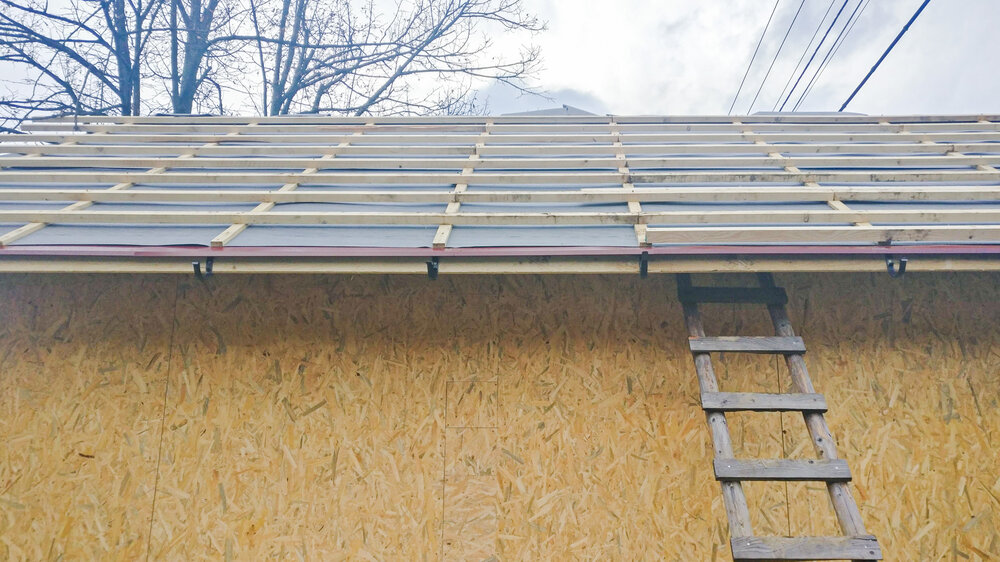
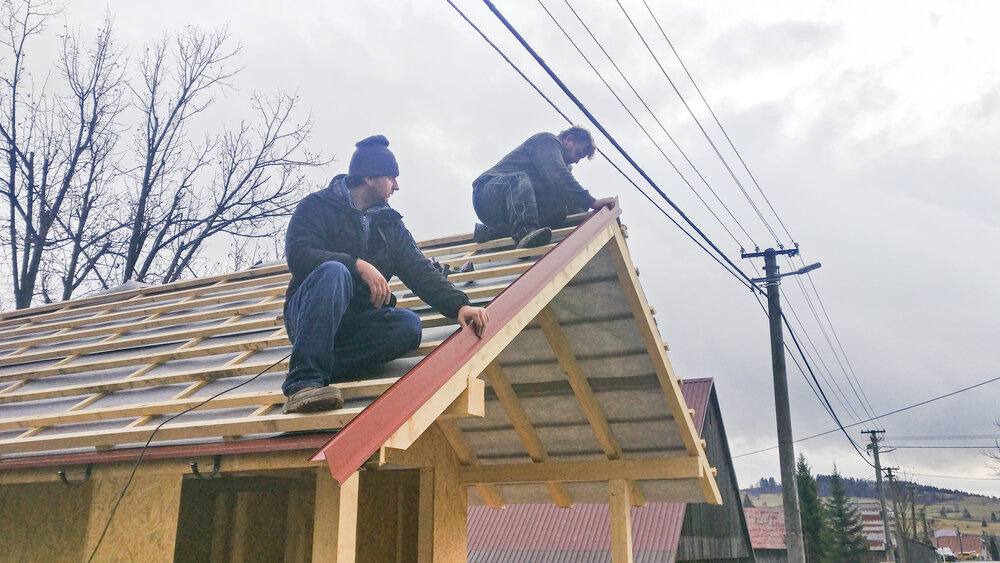
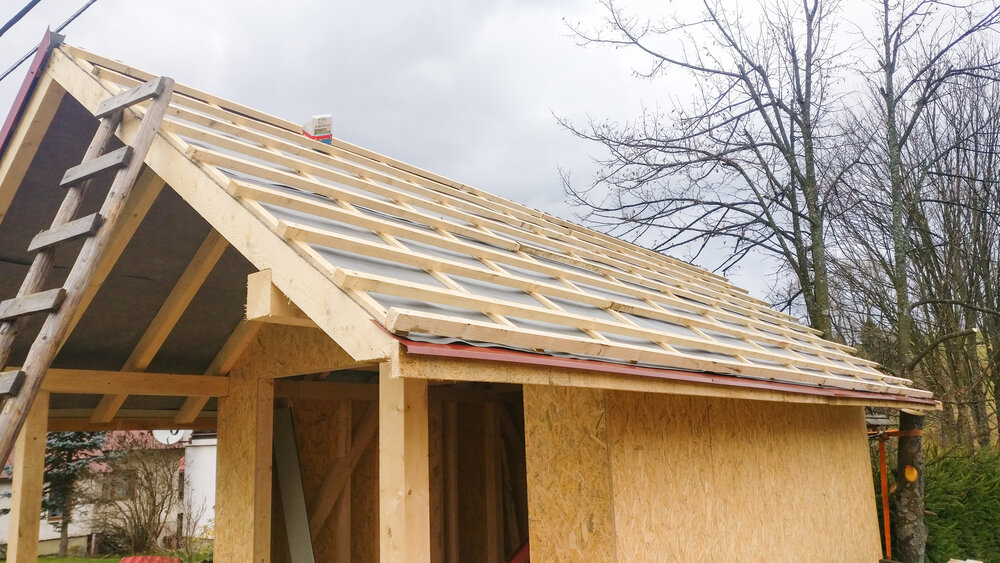
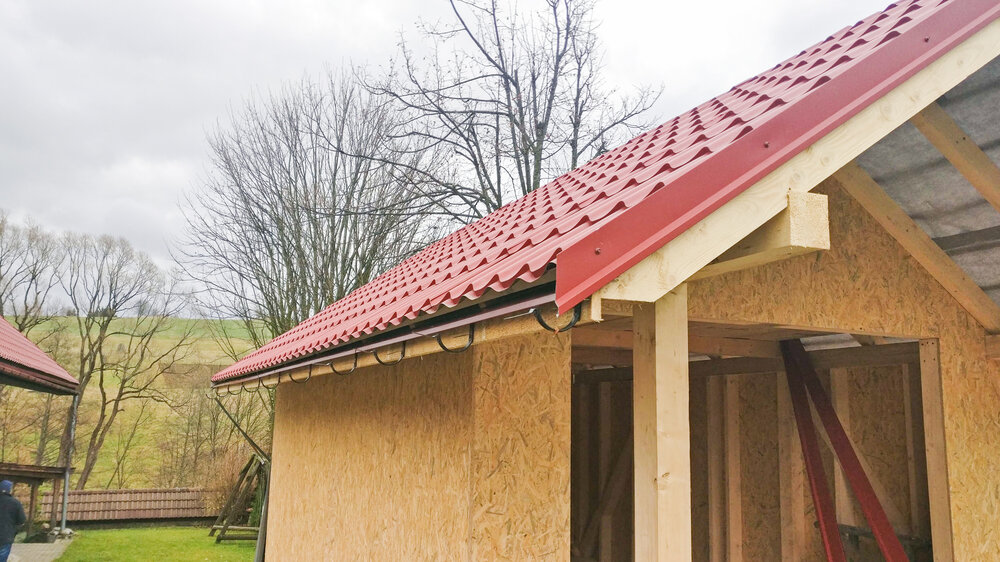
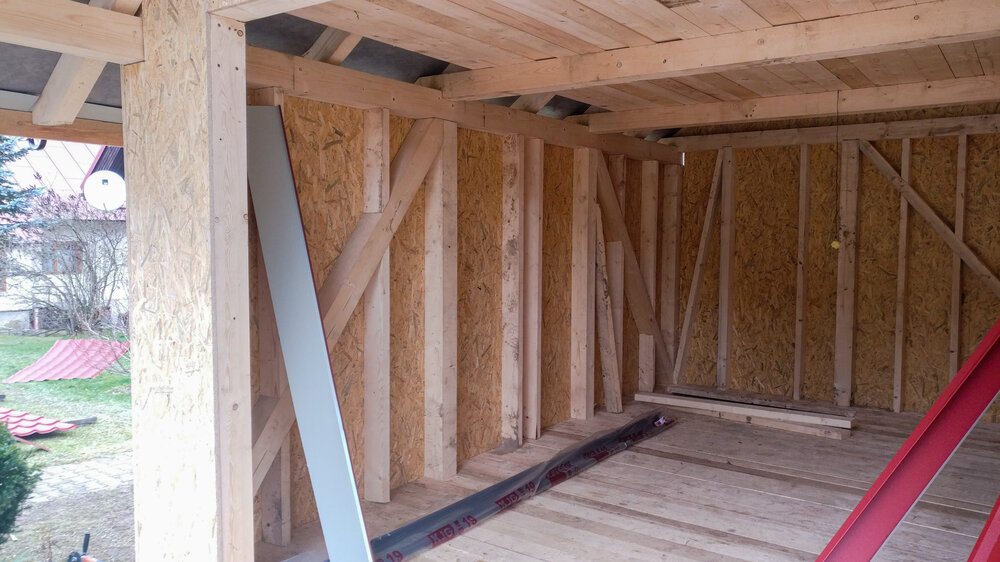
Its about time I got my hands dirty 🙂 My girlfriend’s parents decided to renovate and build a new garage in front of their house which gave me a little opportunity to do some before and after render shots – as well as help out with a little of the carpentry.
This project wasn’t really about having a polished piece of finished artwork but about being apart of the design process – getting to work with the engineer on the plans, selecting materials, taking the before, during and after construction photos and even getting to work with my hands for a change.
Its rare that I get to see the end result of my projects in person but its was interesting to see the design changes that happen on the fly. The most noticeable one you can see here is the roof slope and the little window. The order is; before construction, the rendered image, after construction.
Just for fun I have included some of the construction photos of the little project which took just over a month to build. The fence at the front took much longer as each rock was placed by hand.
Bitmap2PBR Offically is available for public download!
This project began when I was converting my models into PBR setups for real-time rendering. I also needed a way to have the models appear the same when converting to other 3D packages and this was the best way to achieve consistency. After using it on a few projects Ive decided that it could be a useful tool for other artists as well and so Its now officially available for download.
You can see the promo video below
Download is available at the bottom of the page in the Store location.
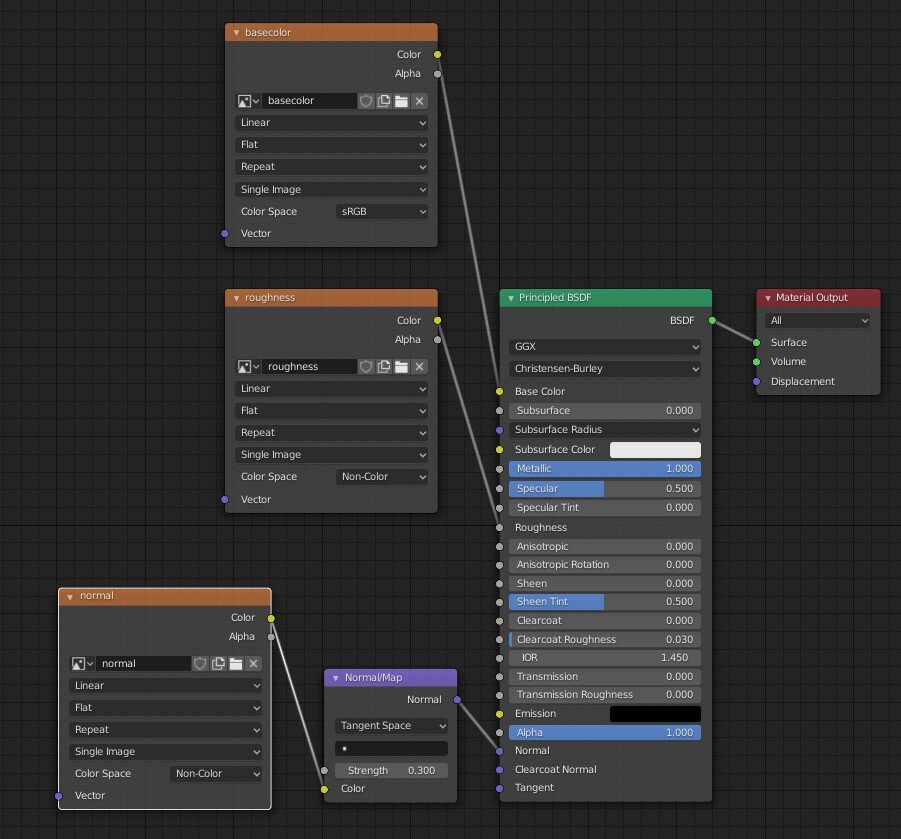
This guide should is designed to export your PBR Metallic/Roughness textures from 3dsmax to blender.
We will take our PBR textures, place them into a standard material and export to FBX. FBX settings are based on your preference and dont affect the material. Just be sure to check your units scale factor if you work in units other than meters.
Dielectric:
Notes:
Specular Level: 0.25 = Specular 0.5 in Blender
Reflection = Checked On, but 0% which turns off Metallic on import
Normal Map: DirectX texture in 3dsmax, I swap this to OpenGL texture for export to blender.
Roughness texture in Glossiness slot.
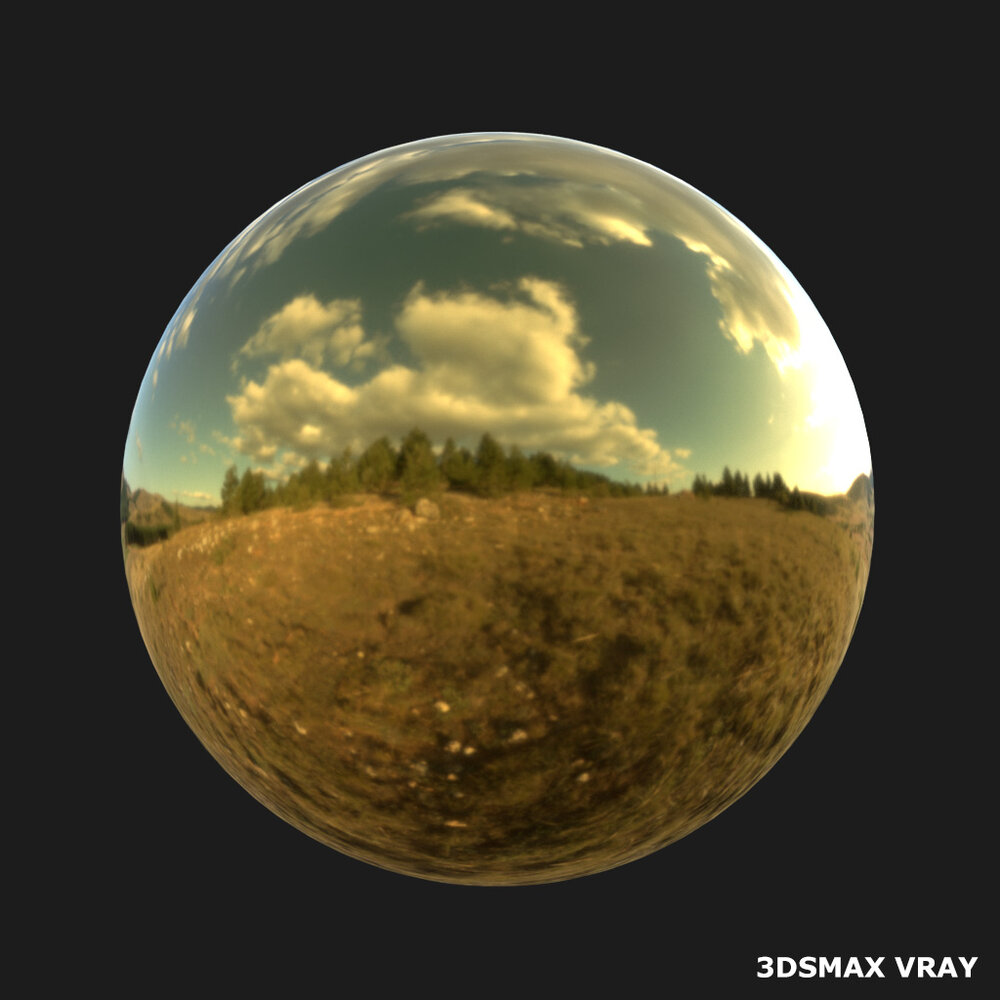
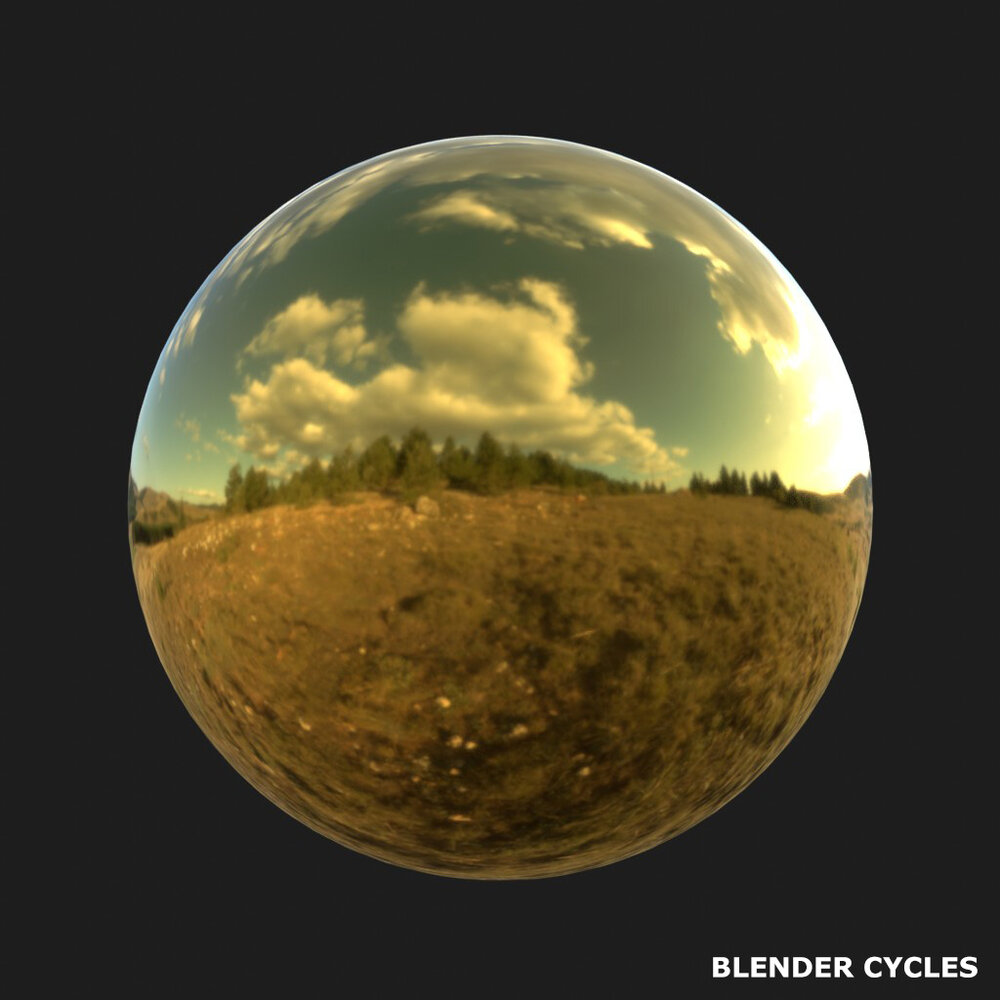
Comparison Renders
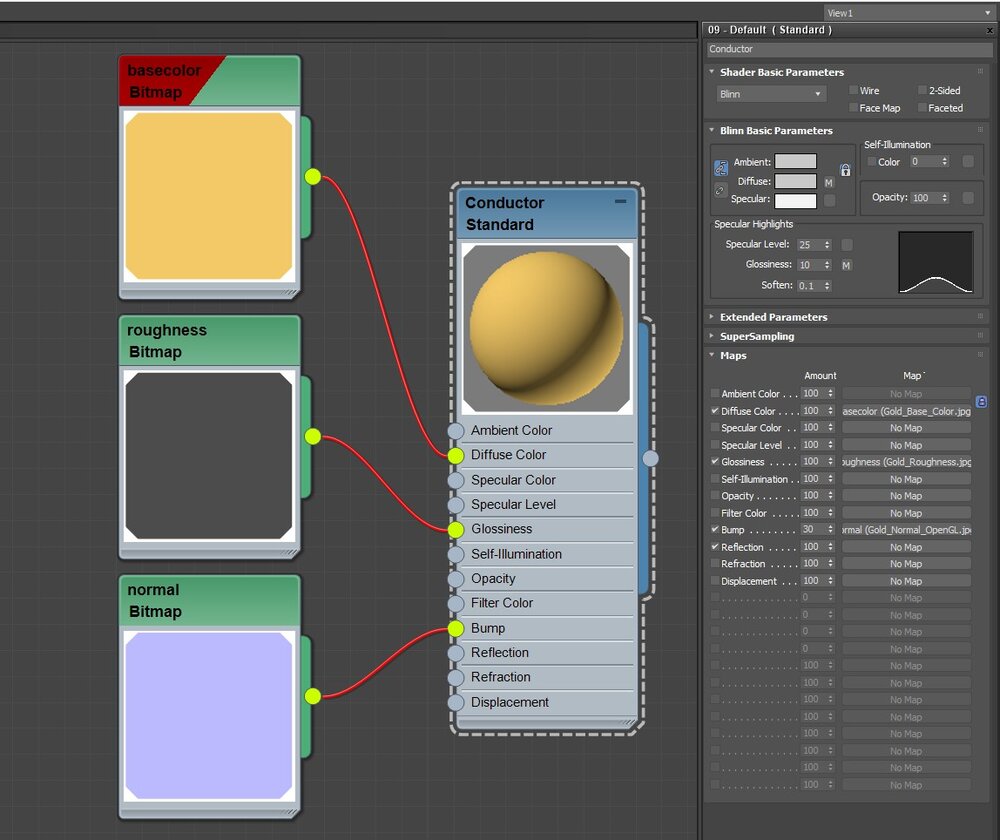
Conductor
Notes:
Same as above except swap the Reflection channel to 100% for Metallic objects (or place the Metallic map here)
Comparison Renders
Specular Control
If you want to control the Specular yourself using a 0/1 Map then place this into Specular Level (3dsmax). This will transfer this to the Specular Channel (blender).
This is a reference chart for those who want a quick way to set up your PBR materials in 3dsmax to get the correct look. Sometimes you will buy a model and it comes with many textures, ill clarify these below.
Dialectric
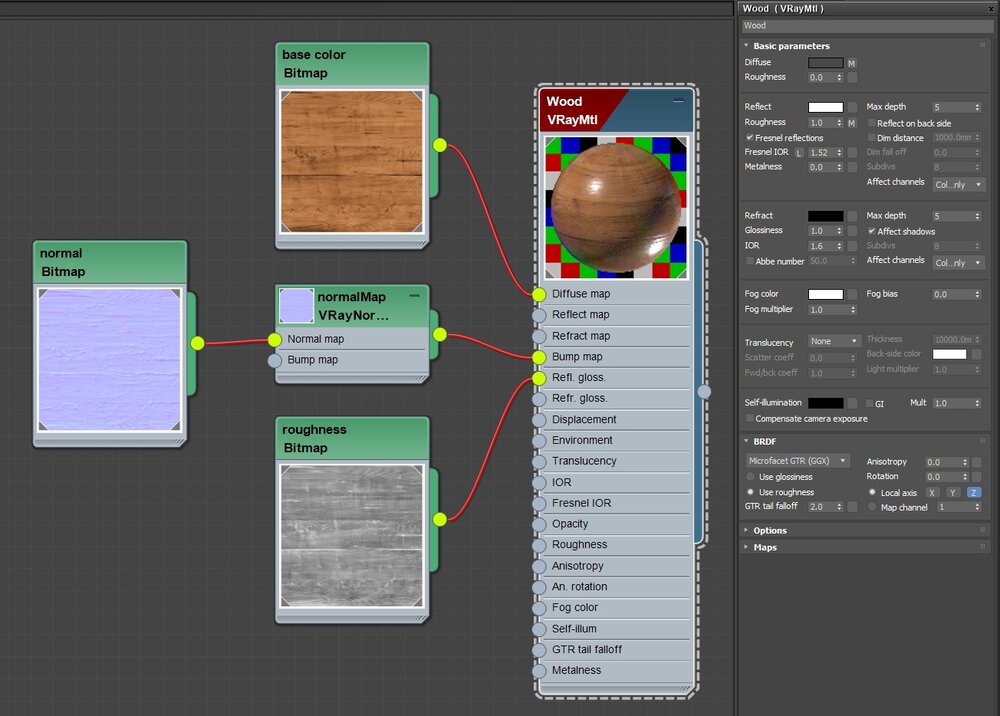
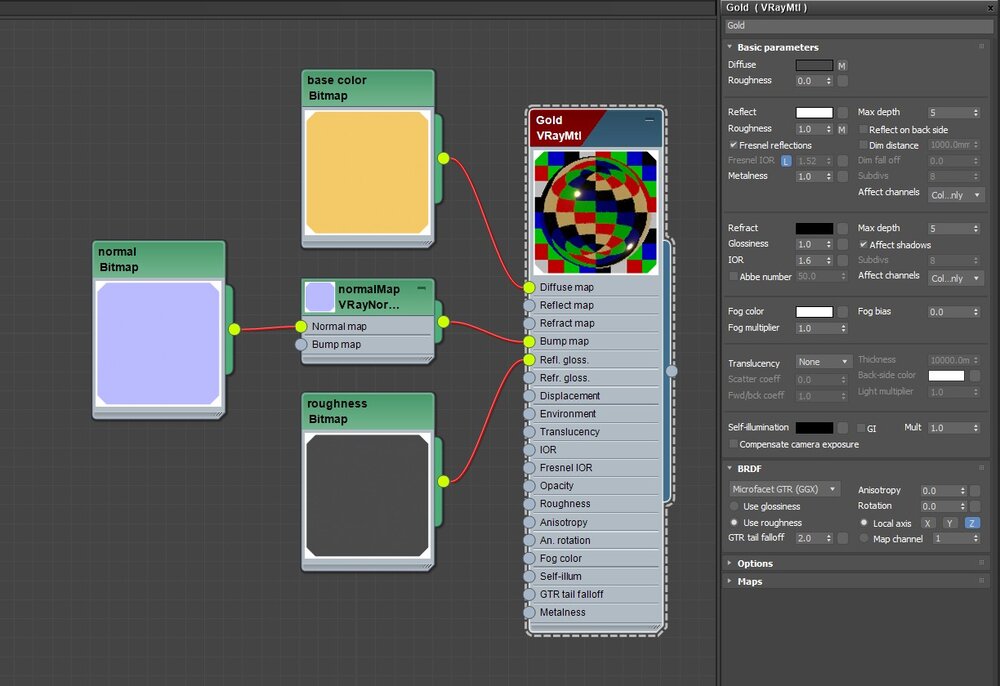
Vray Roughness/Metalness Workflow
Reflection is always white (same as having a white bitmap).
Set the IOR value for the dialectic in Fresnel reflections > Frensel IOR.
Set BRDF > Use roughness.
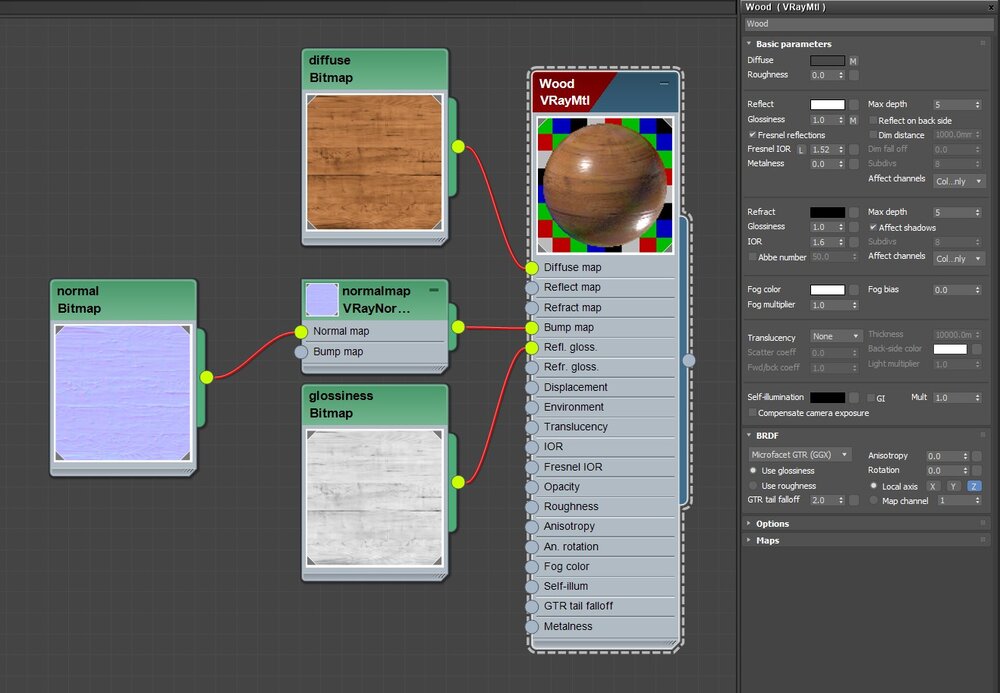
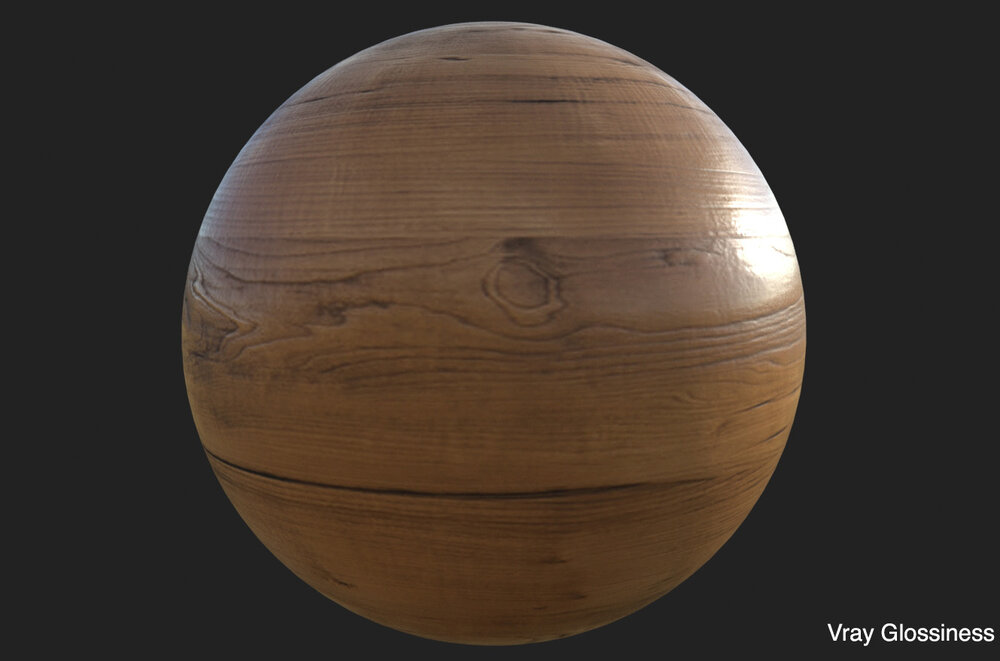
Vray Glossiness Workflow
Notes:
Similar notes as Metallic Workflow however change these properties below.
Change the BRDF >Use glossiness.
Replace the Roughness bitmap with Glossiness.
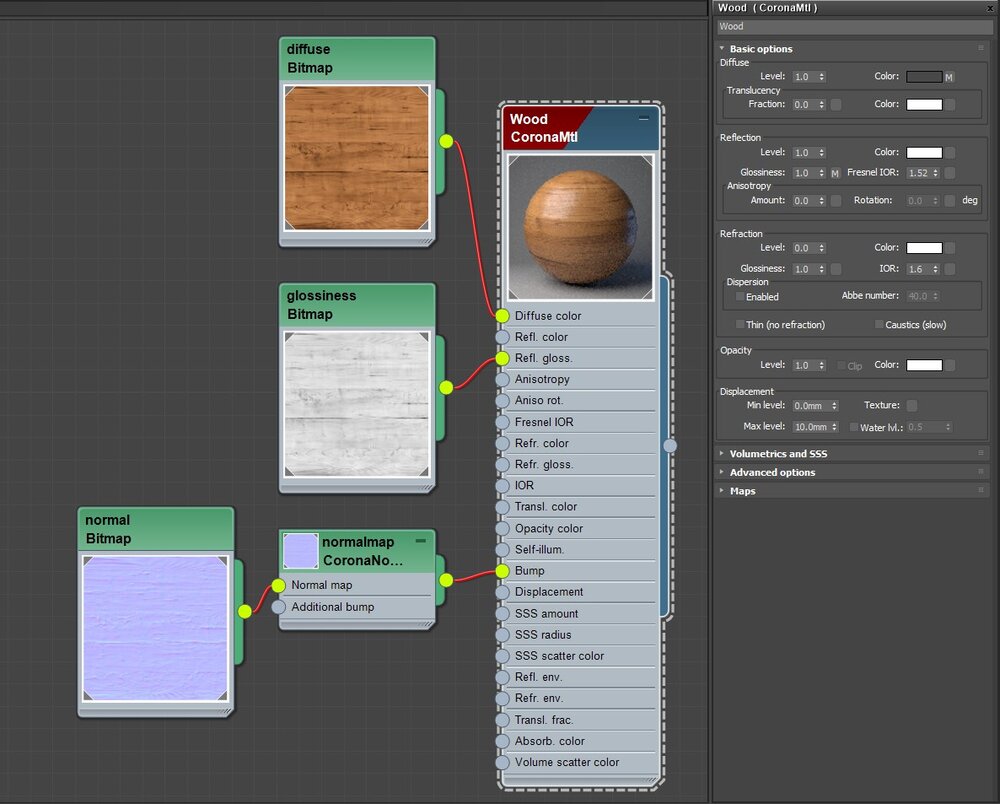
Corona Workflow
Notes:
This method is the same as Vray Glossiness workflow.
Comparison Renders
Conductor (Metal)
Vray Roughness/Metalness Workflow:
Notes:
This is a Conductor the Metalness input is set to 1.0 (same as having a white bitmap).
Reflection is always white (same as having a white bitmap).
Fresnel has no effect as its using the Metalness control, as long as you enable the Fresnel reflections checkbox.
Set BRDF > Use roughness.
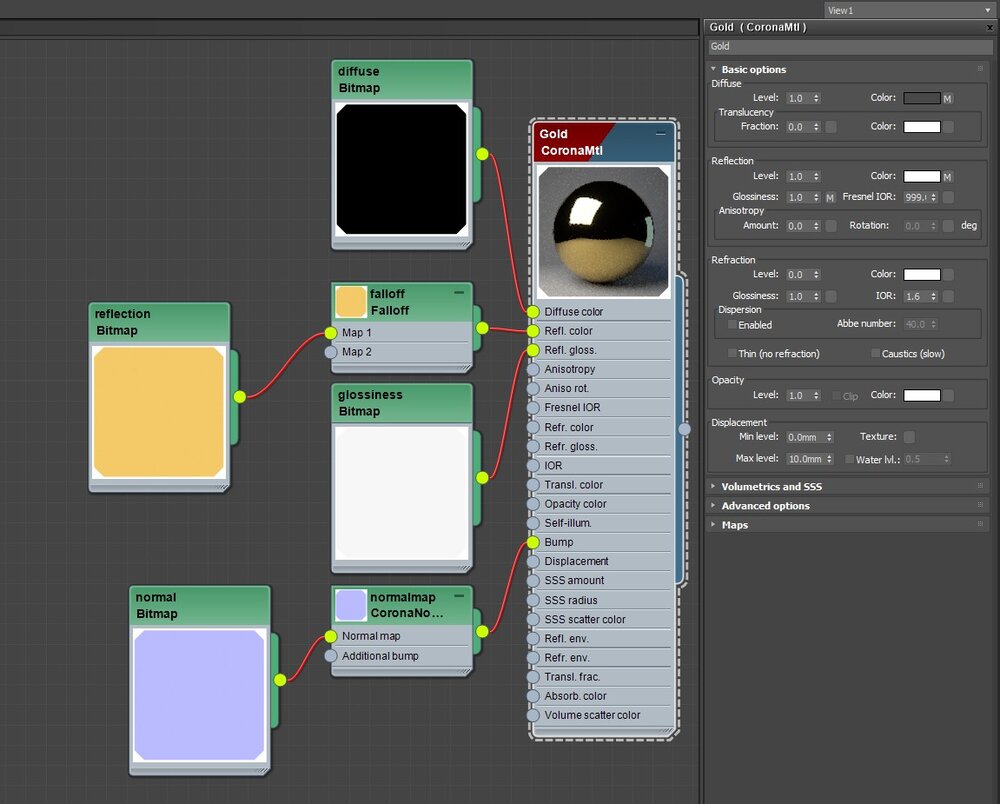
Vray Glossiness Workflow
Notes:
Change the BRDF >Use glossiness.
Replace the Roughness bitmap with Glossiness.
Disable Fresnel Reflections checkbox.
We now have color in our Reflection bitmap, which means the grazing angle will not look correct without some help from an additional falloff. Refer to Vray’s Guide for more information. Specifically this quote: “The Reflection should be set to white so as to get the proper reflectivity and preservation of energy; without this, the glancing angle will never be 100% reflective — which it should be.”
Place your Reflection bitmap into a Falloff node (Map 1) in the Reflect channel. Set the settings as below:
Corona Workflow
Notes:
This method is the same as Vray Glossiness workflow except we simply change the Fresnel value to 999 (which is equivalent to unchecked in Vray).
Comparison Renders
Bitmap Import sRGB/Linear
Make sure you import your bitmaps with the correct gamma. This is a reference below to help you with that.
sRGB – Bitmap Gamma 2.2 (or default import):
Diffuse
Base Color
Reflection
Opacity
Specular Color (if required)
Ambient Occlusion (if required)
Linear – Bitmap Gamma 1.0 (override):
Metallic
Roughness
Glossiness
Normal
Height
IOR (If required)
Ambient Occlusion
If you have a material from the internet that looks like the Ambient Occlusion is in the material preview make sure you Composite > Multiply these in 3dsmax so you get the same outcome as the Preview.
Height Maps
These go in the displacement for your material.
Normal Maps
If you know the normal map is authored as DirectX you can leave the default settings on import.
If you know its OpenGL then you need to flip the green channel, otherwise inspect the map visually to see if it looks inverted.
Other Maps
You will often see other maps such as IOR, Specular, etc, these are not required in the above workflows unless you want them ofcourse and understand how they affect the material. For more information on these you can read my other post which goes into the use of these maps and when you need to use them – which is more often when you have a material with mixed dialectrics and conductors.
Cinema 4D
There is a great guide to do the same technique in Cinema4D here.
Lets talk Physically Based Shading for Vray & Corona. I wrote this short guide mostly as future reference for myself, hopefully you find this useful as well. Authoring or using PBR textures can be a little confusing at first when you are provided many textures – and this break down should help understand whats happening and how to use them correctly. I will keep this as basic as it needs to be using template converters such as BaseColor/Metallic/Roughness Converter within Substance Designer, this is so you can output the textures you need correctly for your workflow and give you an understanding of what they are doing. I will put more technical explanations at the bottom of this article.
Workflow
Lets start with my desired outcome – I want to create textures that will work in Vray and also Corona which match our Substance Designer Preview. I also want to set my scene up so it easily converts from Vray to Corona or visa versa.
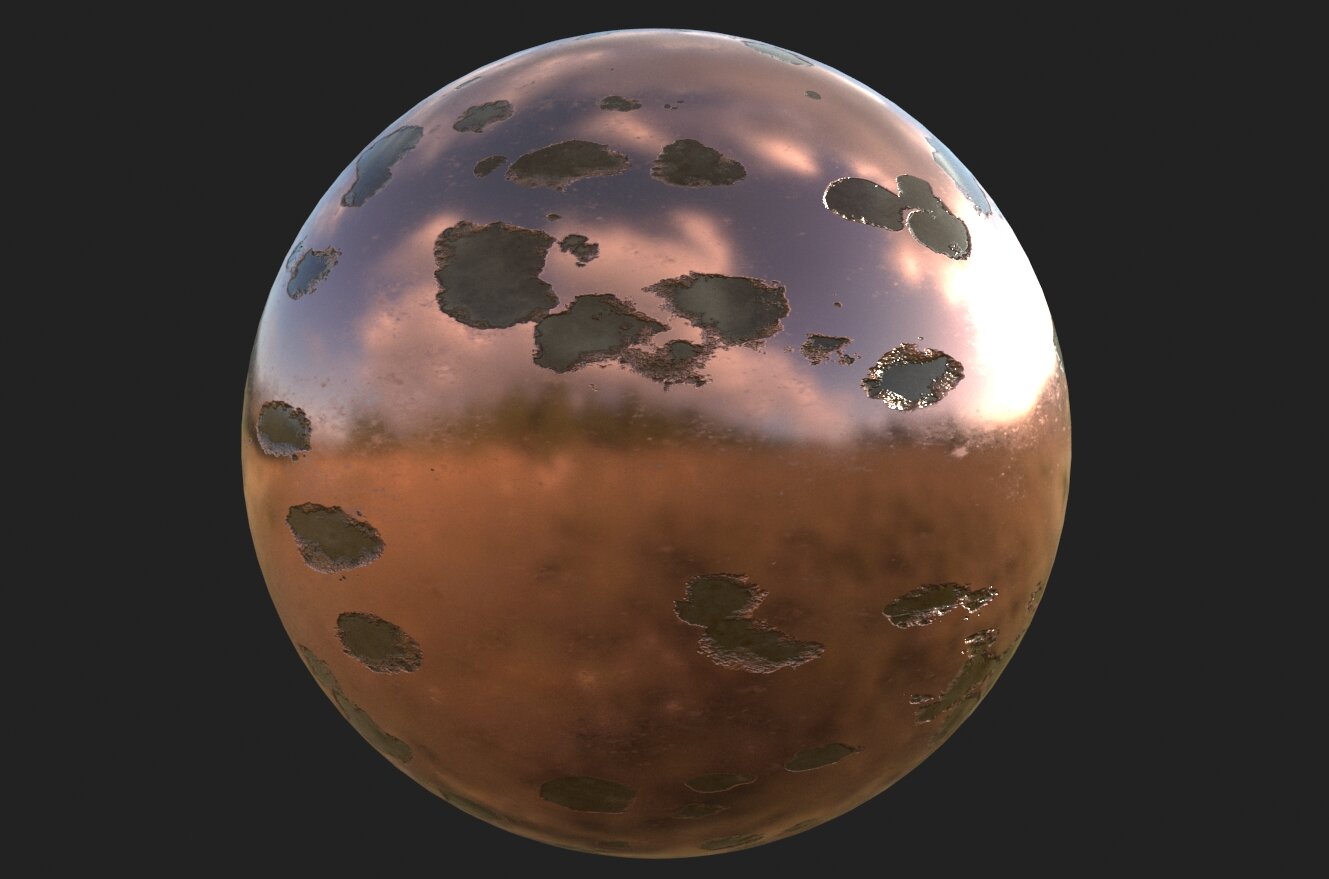
Lets do this with something that seems reasonably simple: A Metal Copper Sphere (Conductor/Metal) with some light glossiness and some chunks removed to reveal the surface below (Dialectric).
Substance Designer Preview
I wont go into the details of how the Shader was made in Substance Designer as it was just a few generated maps – the important part is how we export them and bring them into 3dsmax.
Start a New Substance Graph Template
I advise you set up your initial graph with Metallic/Roughness as its easier to author for other uses.
Material Creation
Setup your material how you like. You can see below my setup is just some basic nodes which produce a base color, normal, roughness & metallic map.
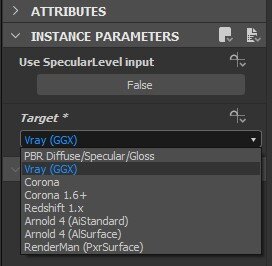
Now you are ready to plug these into the converter template. From the bottom/left menu select Library tab, then Material Filters > PBR Utilities > BaseColor/Metallic/Roughness converter.
Make sure you change the Instance Paramters of this node from PBR Diffuse/Specular/Gloss to Vray(GGX).
You can then go ahead and plug in your nodes into the correct location for each input. Now right click on the BaseColor/Metallic/Roughness converter node and select create Output Nodes.
You are now ready to output your nodes to bitmaps/textures. At the top select the Spanner icon and select Export Outputs…
Lets open 3dsmax and set Vray to the render engine. Set up your HDRI for rendering (I used the one from Substance Designer so I can match the lighting/reflections).
Lets start with our basic input of texture maps and see the result. Only Diffuse & Reflection will have the Input Gamma as Automatic and the rest of your maps will require you to Override the Input to 1.0 as shown below.
Note:
The normal map generated is OpenGL format. So make sure you flip the green channel in your VrayNormalMap settings. (You can always author these as DirectX if you wish to bypass this step)
Unlock the Fresnel IOR in Reflect settings and place your IOR there.
Vray Render
Now when we right click > Corona Converter > START CONVERSION. We get the below, essentially the same result however a slight difference in the highlights on the bottom right normals which is due to the way Corona handles lighting. Never the less, result achieved with our material.
Alternatively, you can just swap the rendering engine from Vray to Corona without doing a conversion as Corona can use Vray Materials such as this without issues. Obviously if you intend on sharing files with someone who doesnt own Vray you will need to convert it first.
Corona Render
And thats it… almost.
Ok for those who have a keen eye, maybe you see something a little different between the Substance Preview and our final result… your eyes are not lying. Before I explain lets have a look at this same material authored for Vray using the Metallic approach (not available for Corona at the time of writing). You will notice that the metallic parts are a bit less saturated in the sky region, also the reflection looks different most notably at the glancing angle of the sphere. However the Metallic render looks much more like our Substance Preview.
Comparison Vray Metallic vs Vray(GGX)
This is due to energy conservation. Quoting the Vray Manual:
“The Reflection should be set to white so as to get the proper reflectivity and preservation of energy; without this, the glancing angle will never be 100% reflective — which it should be.”
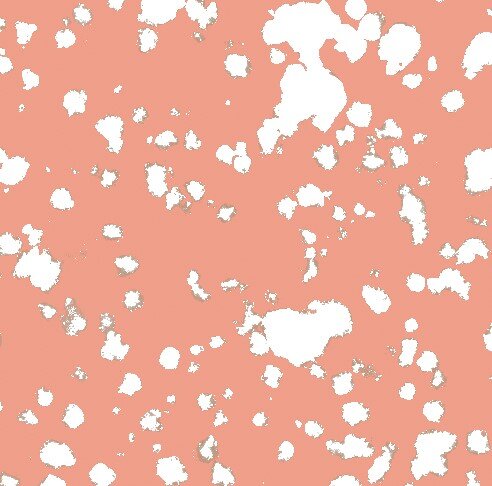
As you can see from our Reflection Texture it contains the Copper Color so we are losing our fresnel in the metal area.
Reflection Texture
You could remedy this by using a Complex Fresnel and Mix it with the original Reflection Texture making sure the metal parts are receiving the Complex Fresnel (I used the inverted Metallic Mask as the Mix Amount). Complex Frensel is a free plugin by Siger Studios.
Complex Fresnel Material Setup
Complex Fresnel Render
However this can complicate things – and the whole point of PBR is to simplify things as well as drive your workflow towards using texture maps.
Pros of this workflow:
Easy to author for both Metallic and Vray(GGX).
Can easily convert from Vray to Corona and visa versa.
Dialectric’s work as expected in terms of fresnel.
Can control the fresnel IOR (more information about how at the bottom of this article).
Cons of this workflow:
Metals become difficult to manage fresnel due to the energy conservation issue.
Vray Render – Metallic
Make a duplicate of your graph and remove the Outputs and Converter node, name this graph differently.
Create a new node from Library > Material Filters > PBR Utilities > Base Material
You should now have a Base Material node with no inputs. To enable the inputs, on the right side panel select Instance Paramters > User-Defined Maps and enable the ones you intend on using.
Now you can plug in your nodes into the inputs of the Base Material and then right click and select Create > Output Nodes. Then export as we did before.
We can now plug in our textures into a 3dsmax material. Create a new Material in 3dsmax, this time we leave Reflect > Fresnel Reflectionat default settings, change the BRDF to Use roughness, change the Reflect color towhite. Just be aware of which format you created your Normal in Substance, if you created this as an OpenGL Normal then you can do as we did before and flip the green channel. If you authored it as DirectX Normal you can leave it unchecked.
Pros of this workflow:
Easy to author for real-time and use with render engines that support Metallic workflow.
Less textures required.
Metals are easy to manage.
Cons of this workflow:
Cant convert from Vray to Corona or other render engines that dont support metallic textures.
Fresnel IOR locked at 1.5 for dialectrics and off for metals. This however may not be such a bad thing, if you have an interest in why read down below.
Ok thats it basically, if you want to know more technical stuff, lets go down the rabbit hole.
Down the Rabbit Hole
Glossiness/Specular Workflow
Ok so we covered so far:
Creating a Metallic material.
Converting this to a Vray(GGX) material.
We are now going to look at the Glossiness/Specular workflow. The way this differs from the Vray(GGX) method is that the IOR and Reflection is created in the one texture. Duplicate your graph and rename it, we will take our previous setup and create a new BaseColor/Metallic/Roughness converter and leave the defaults as Target: Diffuse/Specular/Gloss.
Now in 3dmax we can use our previous setup for the Vray(GGX) and change a few settings. Disable Fresnel reflections, remove the IOR Texture and place our Specular Texture in the Reflection slot.
I won’t be going into pros/cons for this workflow, as its evident from our previous examples we dont have white in our reflection channel, thus our falloff/reflections will not match our reference. Its also easy for artists to accidently break energy conservation when manually adjusting the Specular Color or Level without a reference chart.
Specular Color & Specular Level
Specular Color:
This is the color that is used to determine the fresnel and color of the reflections. We can see this baked into our Specular map along with the metal color. You can change this color using a built in node within Substance Designer called PBR Dialectric f0 and set a Custom Fresnel – which for this example we will use a fresnel of 1.5. Right click on this node and create an Output.
Now we want to blend our Base Color with the Specular Color using our Metallic mask.
As you can see we have the same result as earlier, however now we can set a Custom IOR from the drop down list in our PBR Dialectric > Instance Parameters >Specular f0 > Custom IOR.
The formula to convert Fresnel IOR to Specular Color is:
This is what the node graph looks like in Substance Designer for the above formula. You can also inspect this graph by selecting Open Reference > PBR Dialectric f0 > Uniform Color (bottom left) > Edit Opacity (function).
Specular Level:
This is what goes into the Use SpecularLevel Input area in Substance Designer when using Glossiness/Specular workflow.
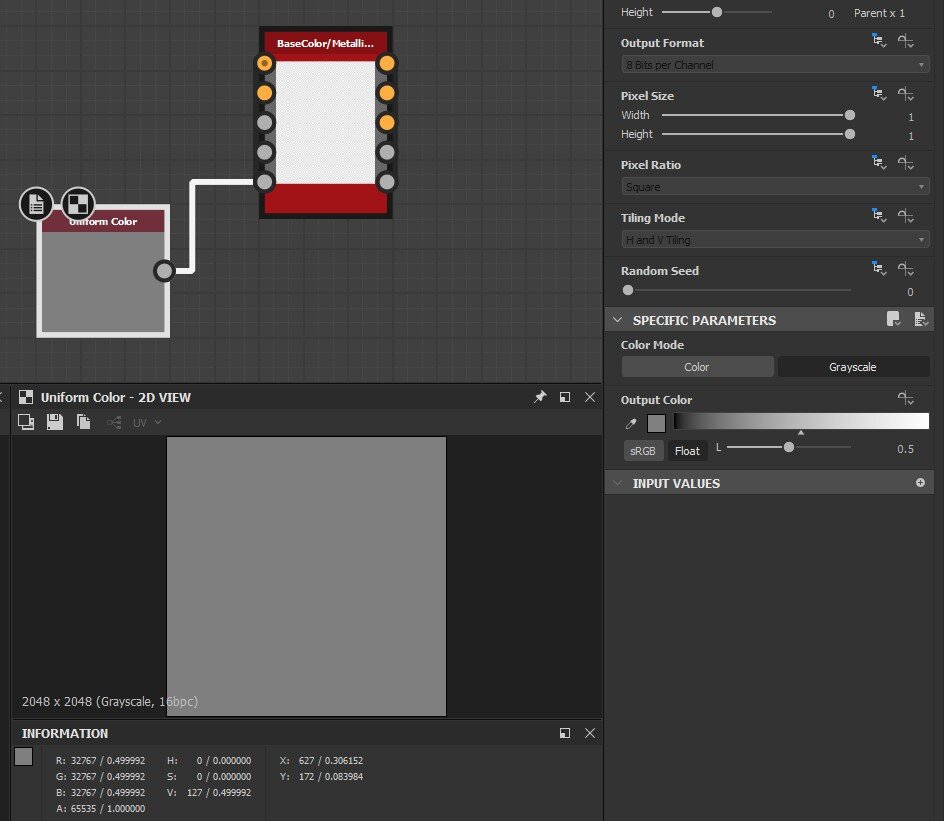
Now, as mentioned in The PBR Guide most dialectrics fall between 0.04 and 0.08 linear (4-8% Reflectance at f0). For those more familiar with Fresnel values this is between 1.5 and 1.79.
0.04 Reflectance turns out to be 0.5 Specular Level. This is useful if you want to change the dialectric fresnel value in the Glossiness/Specular workflow. When you plug a 0.5 linear Greyscale node (Uniform Color) into the Specular Level you should get the same result as you get without a Specular Level input – because the default Reflectance is 0.04 (or fresnel 1.5).
Once this gets converted using the formula within the BaseColor/MetallicRoughness converter node, it should display in your IOR map as 0.666667 for the dialectric area, metals will always be .000992.
You can now change this linear Specular Level to suit whatever fresnel you require. I found it difficult to find a chart of common Specular Levels so I built an expression node to control the Output Color of the Greyscale node to use an input Fresnel Value which will return a Specular Level. You could use the Python script I created at the bottom of this article to give you the exact number you require.
The formula to convert Fresnel Value to Specular Level is:
To show you how you can set this up for yourself in Substance Designer select your Greyscale Node > Output Color > Expose (function). You can then set a name like ior_value.
The function button will then turn blue and you can left-click on it to enter the function graph. You can then add the following nodes and set the last Divide node as Output (right click).
You now have an easy way to change the Fresnel Value and have the SpecularLevel/IOR map update automatically within Substance Designer. This ior_value you exposed before will be available in the main menu when you double click on an empty area > Input Parameters > ior_value > Default. Set the Default to 1.5 and you will see your Greyscale Linear Value change to 0.5 and your IOR dialectric texture change to 0.666667 (in the grey area). Obviously feel free to experiment with other fresnel values.
So was it all worth it? Lets have a look at some comparison renders.
This is the range where most dialectrics sit, averaged out to 3 images for simplicity. Visually there is not much of a difference which is why the PBR standards are hard coded to 1.5 Fresnel taking some of the technical work out for the artist and relying more on your other inputs such as roughness, bump, height etc – where you get the most “bang for your buck”.
Workflow Tips:
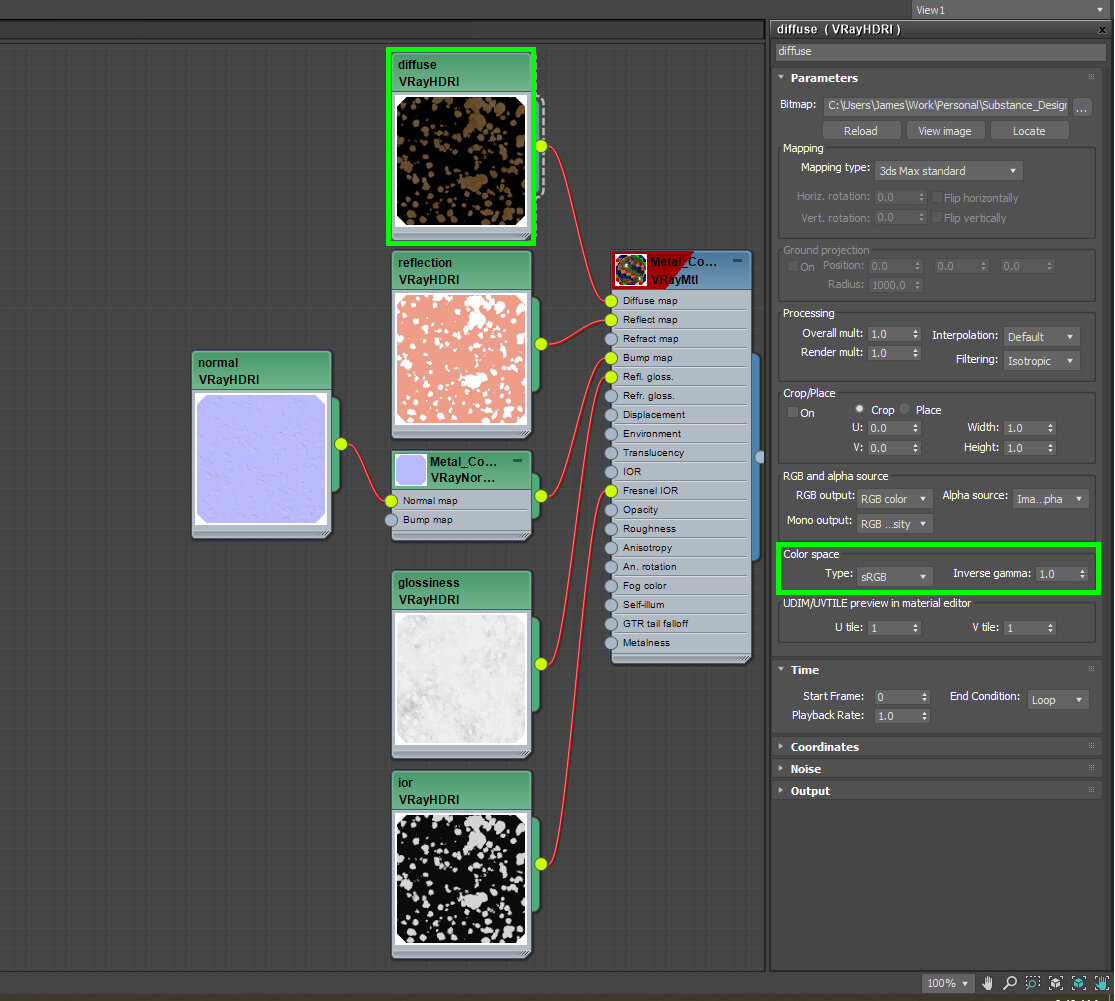
HDRI Vray Materials
Some people prefer to work with VrayHDRI instead of standard bitmaps. The process is the same however your images will default to linear (gamma 1.0) on import. This can save you a few clicks. Its also nice to see the color space of the image directly without having to check manually. You can override the gamma to 2.2 (automatic for standard 3dsmax bitmaps) for Diffuse/Reflection just by changing the color space to sRGB or leaving the default space as Inverse and change the Gamma to 0.4545 – this will have the same outcome.
Just note that you may have a difficult time converting this to other render engines if they dont support VrayHDRI in their converter.
Python Scripts
Fresnel IOR to Value:
'''
James Vella 2020
www.jamesvella.net

This script takes the Fresnel value and gives you the Reflectance at f0 value,
1/IOR, Specular Level, Specular Range, and PBRDialectric f0 value for the
Specular Color. Make sure you replace the FRESNEL value.
'''

from math import sqrt

FRESNEL = 1.5                                                     # Replace this with the Fresnel Value

Reflectance  = ((FRESNEL-1.0)**2) / ((FRESNEL+1.0)**2)            # Formula for converting Fresnel to Reflectance at f0.
RemappedIOR = ( 2.0 / (sqrt(Reflectance)+1.0)) -1.0               # Formula for converting Reflectance to 1/IOR.

SpecularLevel = Reflectance / 0.08                                # Convert Fresnel to Specular Level value
SpecularRange = (FRESNEL-1.0) / (FRESNEL+1.0)**2                  # Forumula for Specular Range Value usually between 0-8%
PBRDialectricf0 = Reflectance ** 0.4545                           # Find The PBR Dialectric f0. This is the value for the Specular Channel.


print("The Fresnel value is: ", FRESNEL)
print()
print("The Reflectance at f0 linear value is: ", round(Reflectance,6))
print("The 1/IOR RGB linear value is: ", round(RemappedIOR,6))
print()
print("The Specular Level linear value is: ", round(SpecularLevel,6))
print("The Specular Range linear value is: ", round(SpecularRange,6))
print("The PBRDialectric f0 for the Specular Color Channel is: ", round(PBRDialectricf0,6))
This Prints:
The Fresnel value is:  1.5

The Reflectance at f0 linear value is:  0.04
The 1/IOR RGB linear value is:  0.666667

The Specular Level linear value is:  0.5
The Specular Range linear value is:  0.08
The PBRDialectric f0 for the Specular Color Channel is:  0.231545
Reflectance to Fresnel:
'''
James Vella 2020
www.jamesvella.net

This script will take a Reflectance value at f0 (for example 0.04) and turn it into a Fresnel value (1.5).
It also gives you the remapped 1/IOR value.
Make sure you replace the REFLECTANCE value.
'''

from math import sqrt

REFLECTANCE = 0.04                                          # Replace this with the Reflectance at f0.

RemappedIOR = (2.0/(sqrt(REFLECTANCE)+1.0))-1.0             # Formula for converting Reflectance to 1/IOR.
IORtoFresnel = 1/RemappedIOR                                # Calculate IOR value back to Fresnel value.

print("The Reflectance at f0 linear value is: ", REFLECTANCE)
print()
print("The Fresnel value is: ", round(IORtoFresnel, 3))
print("The 1/IOR RGB linear value is: ", round(RemappedIOR, 6))
This Prints…
The Reflectance at f0 linear value is:  0.04

The Fresnel value is:  1.5
The 1/IOR RGB linear value is:  0.666667
The first instalment of Corinthian Door series to come. This is the Infinity Range and includes 9 doors, all rigged for animation complete with locks, latches, screws and hinges. These are typically Entrance Doors so open outwards only.
The files also include a version for Corona/Vray, Blender, OBJ/FBX. All with materials/textures included. The Corona/Vray files also have a version with Chamfer modifiers so the artist can control how they would like the bevels to be. There is also a mesh version for those who are happy with it as intended. These models are designed to be high quality while being low poly best suited for kit-bashing.
For a closer look at the technical details you can check out the link below:
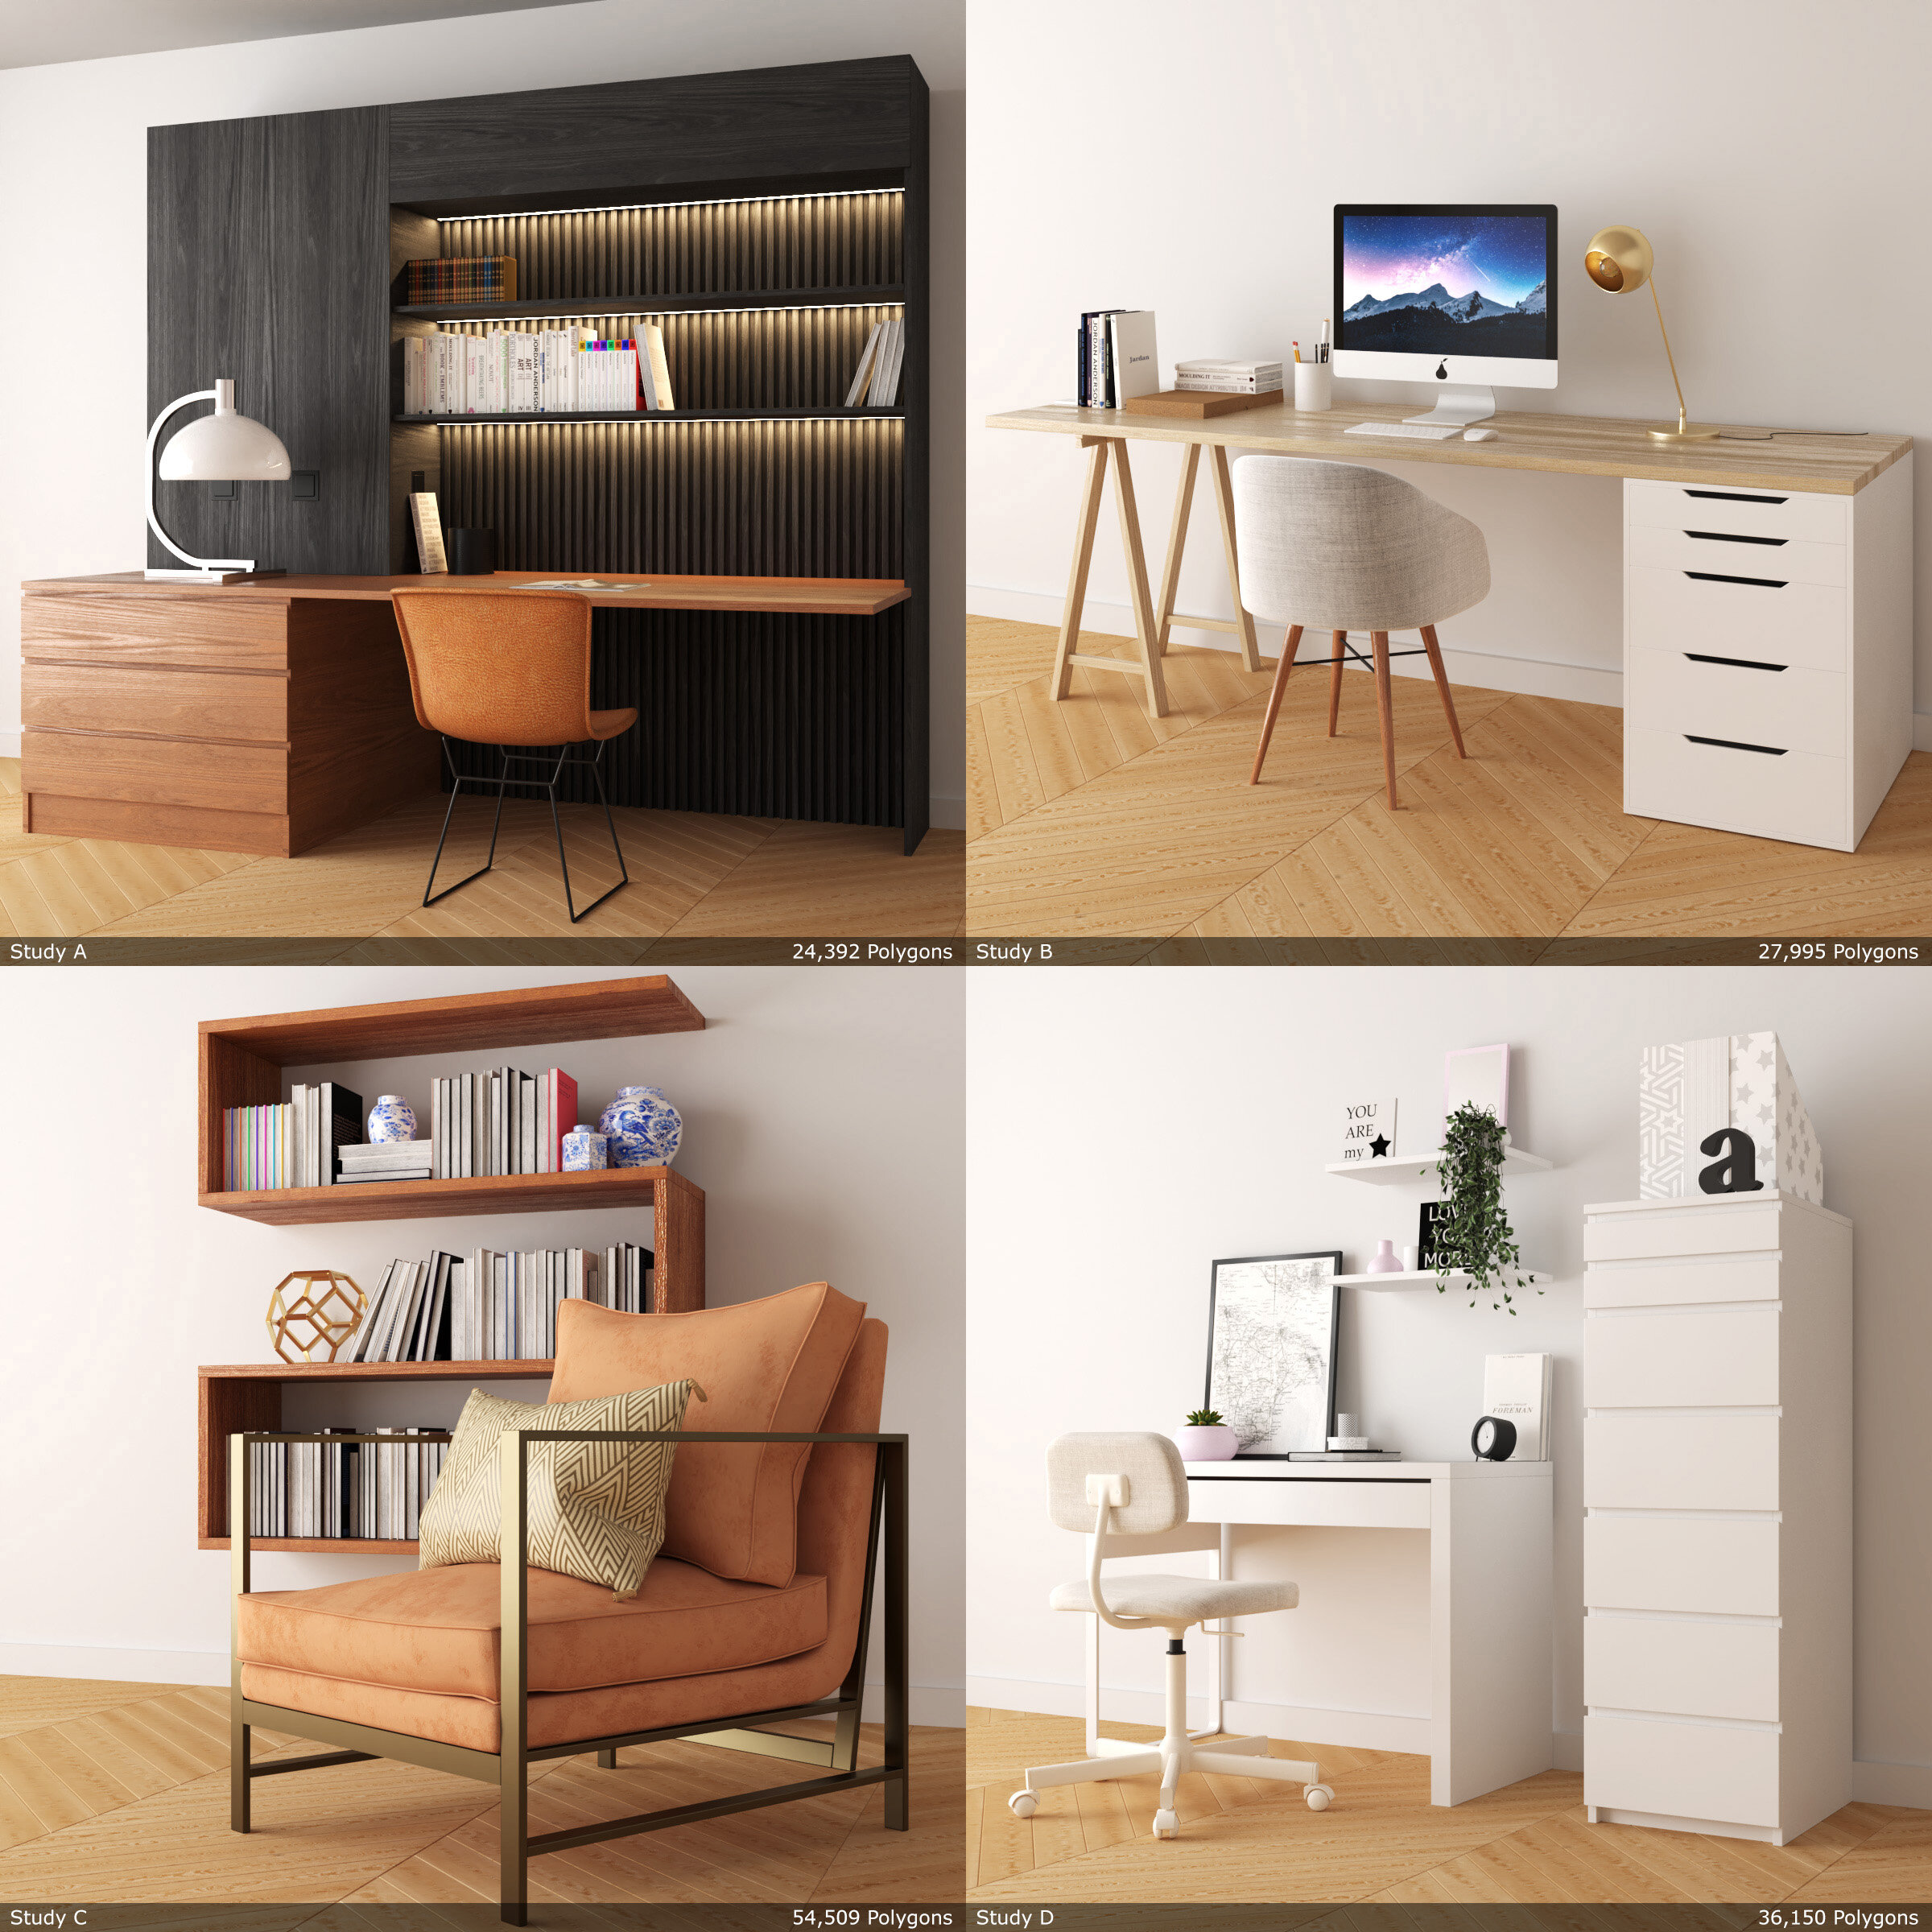
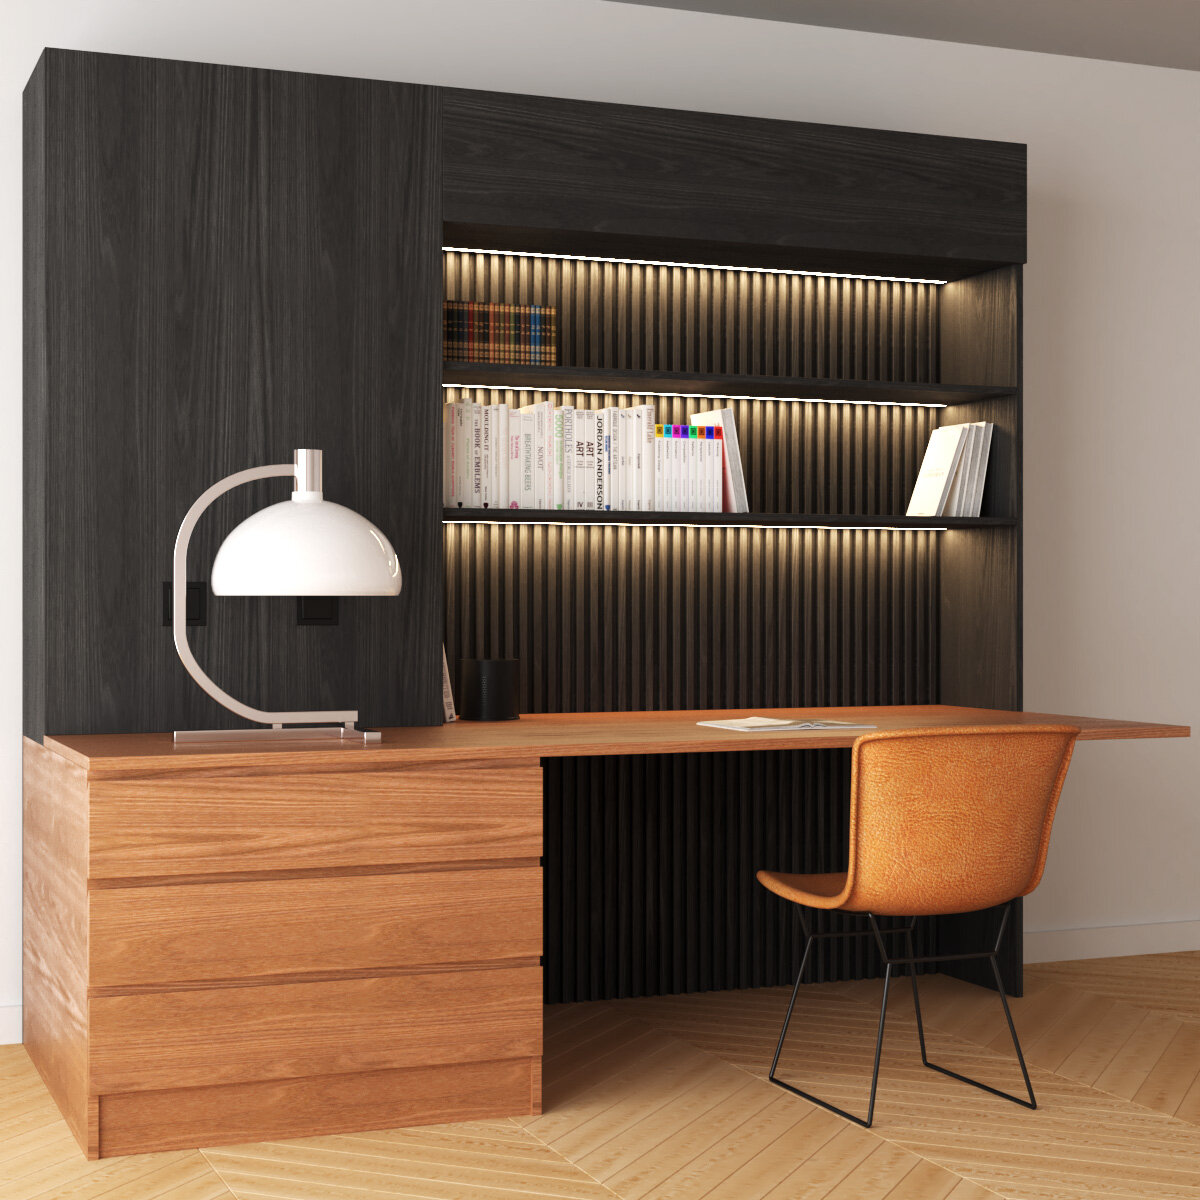
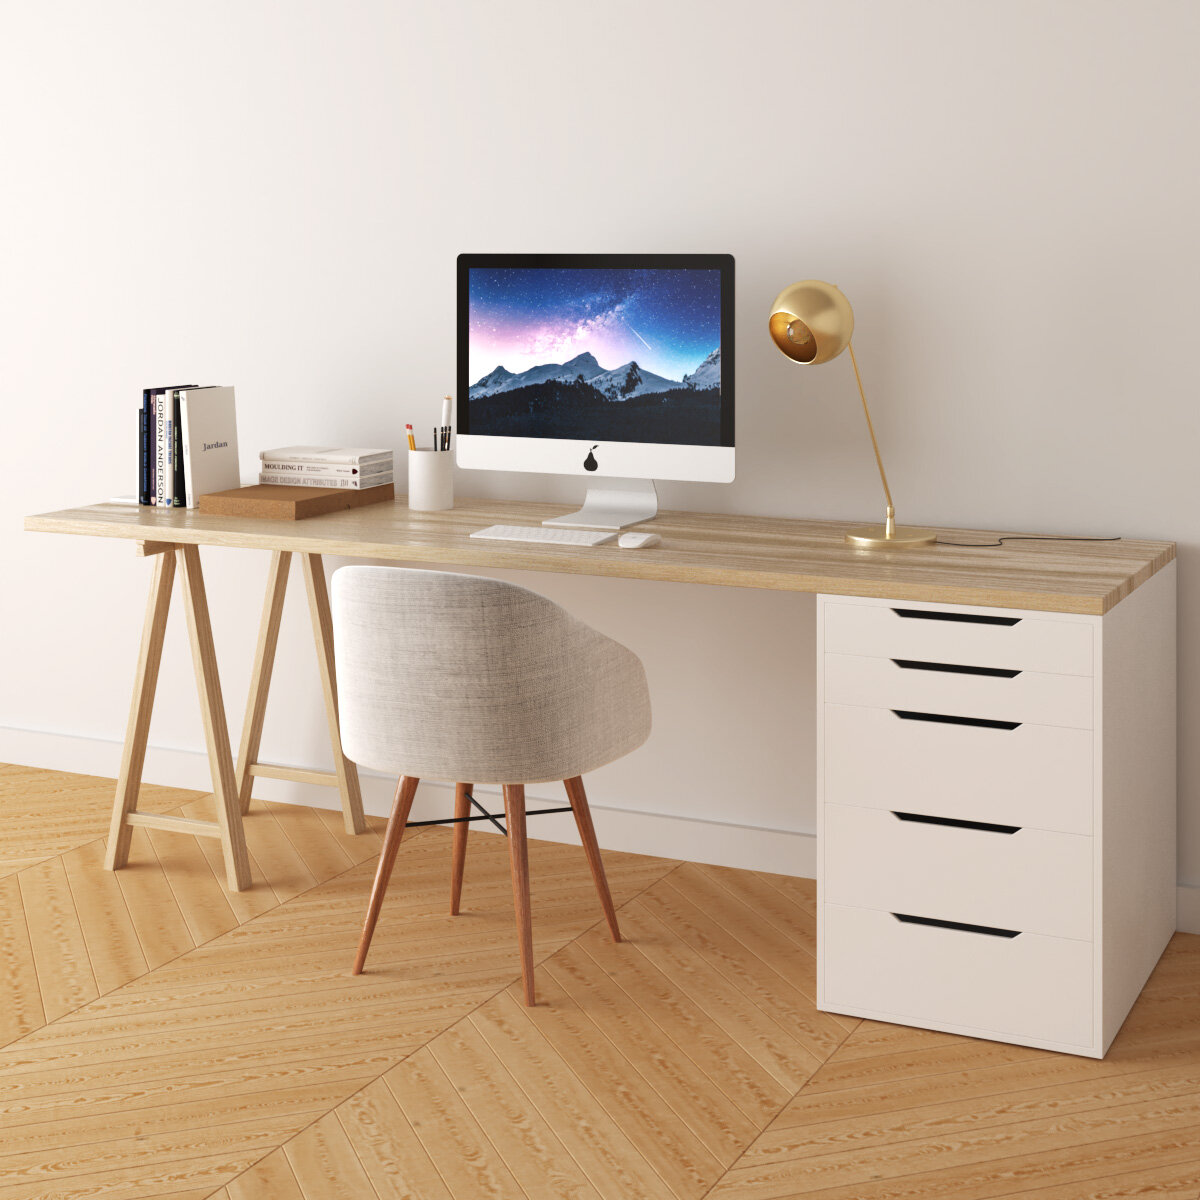
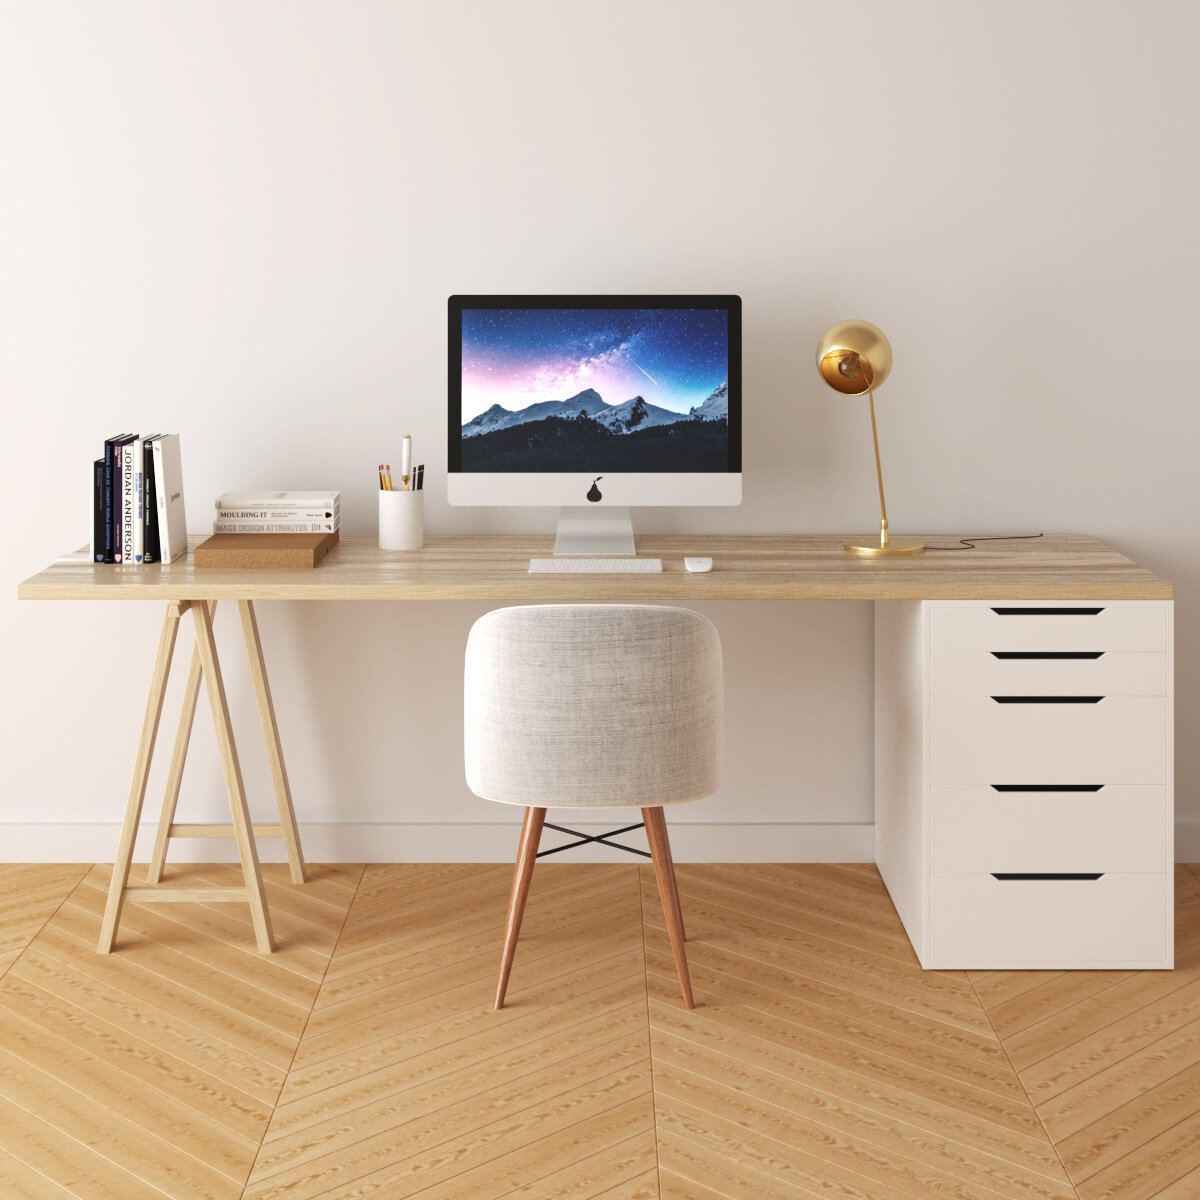
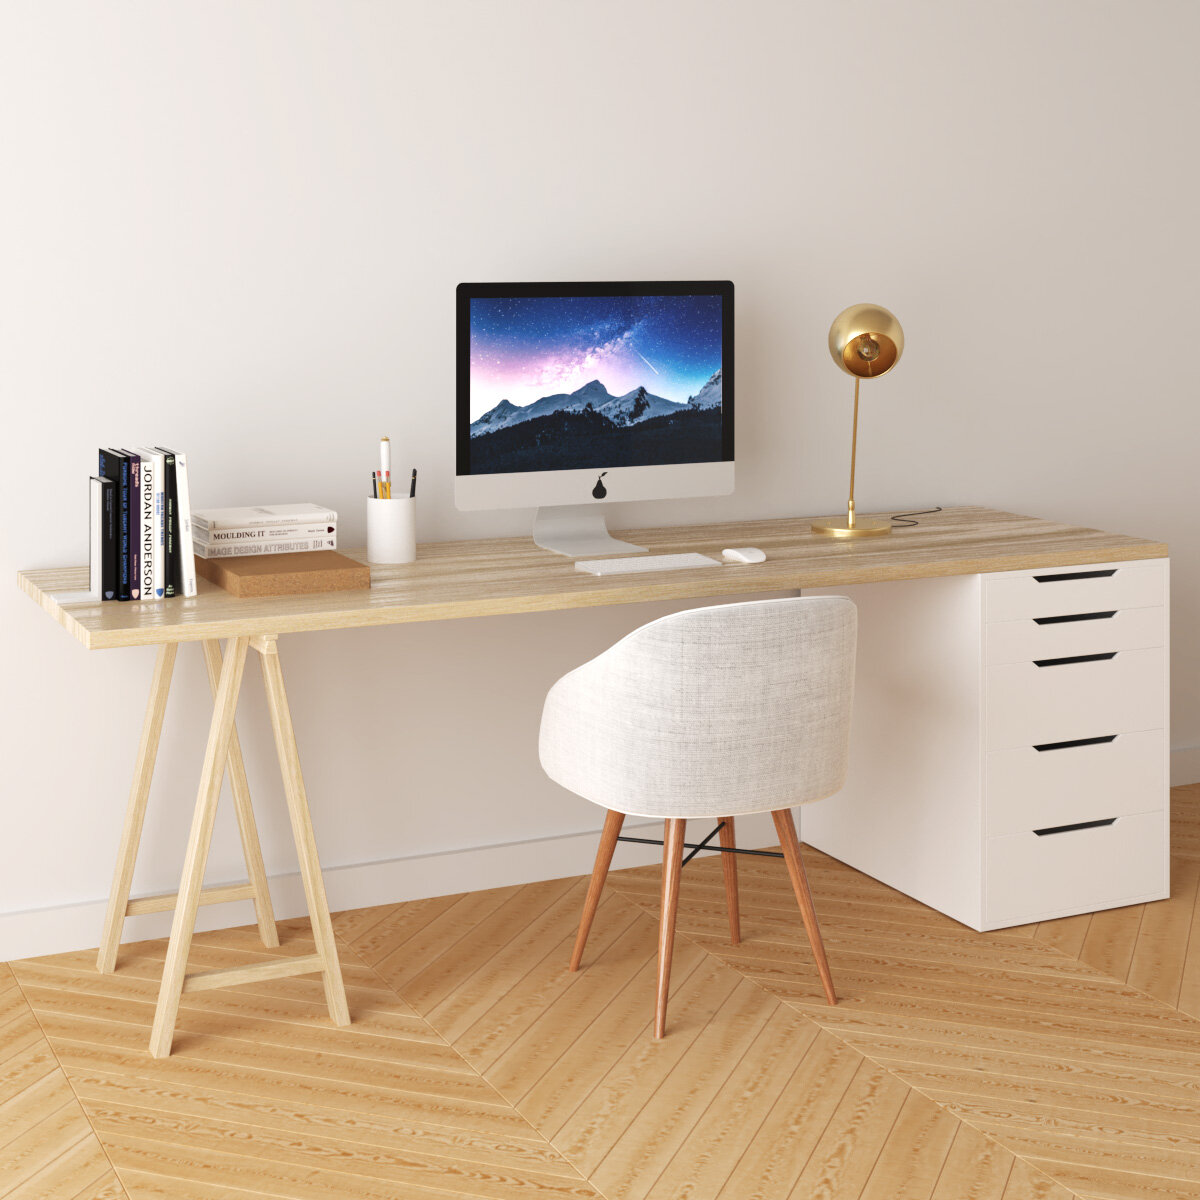
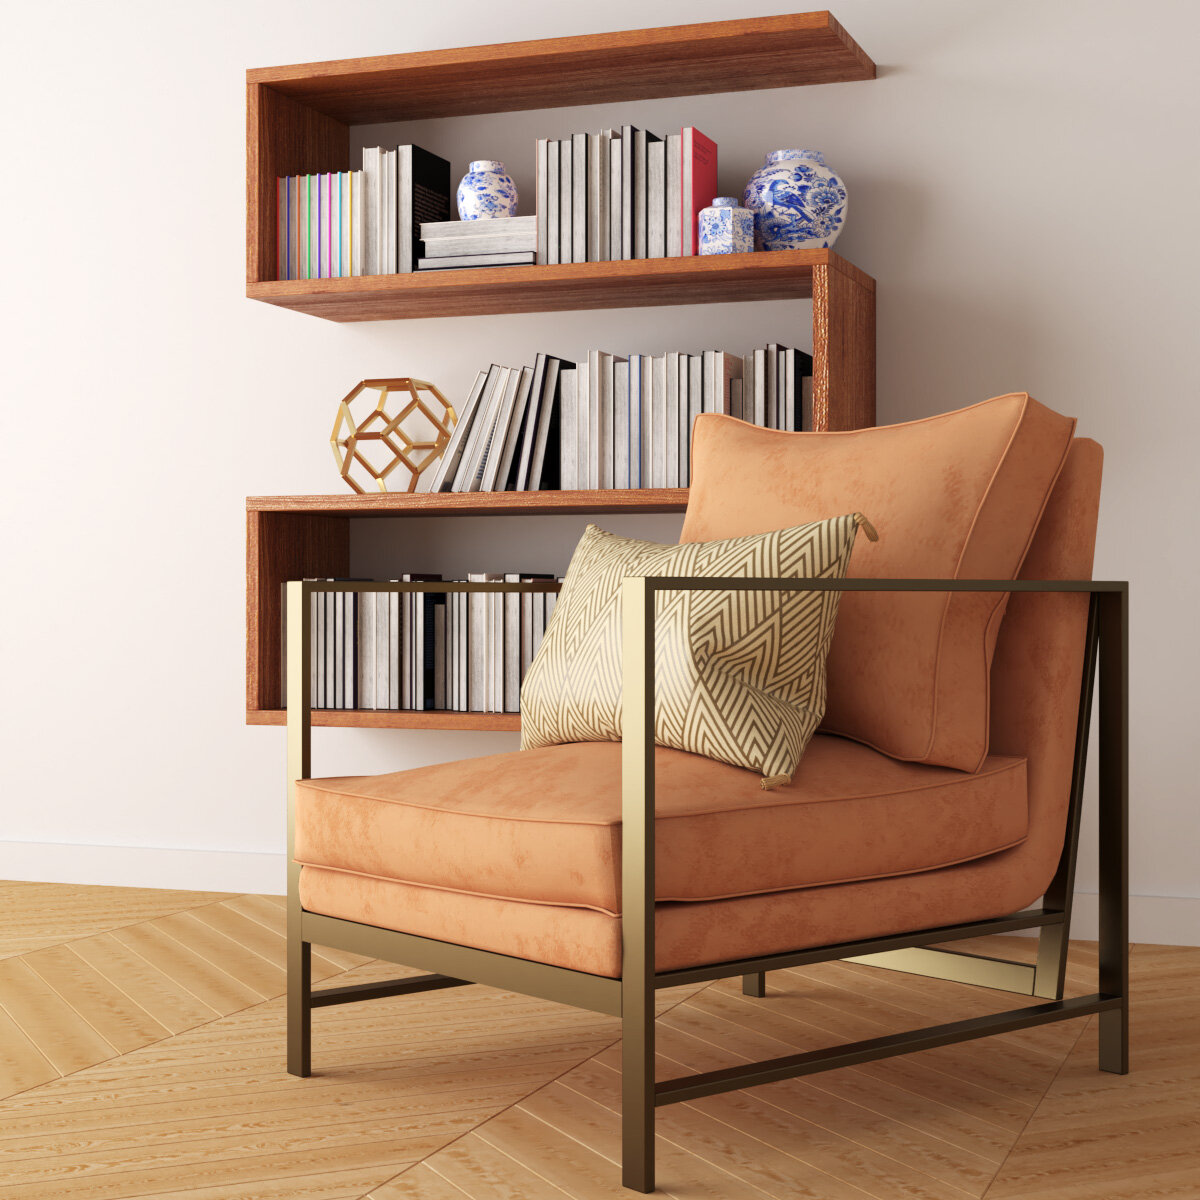
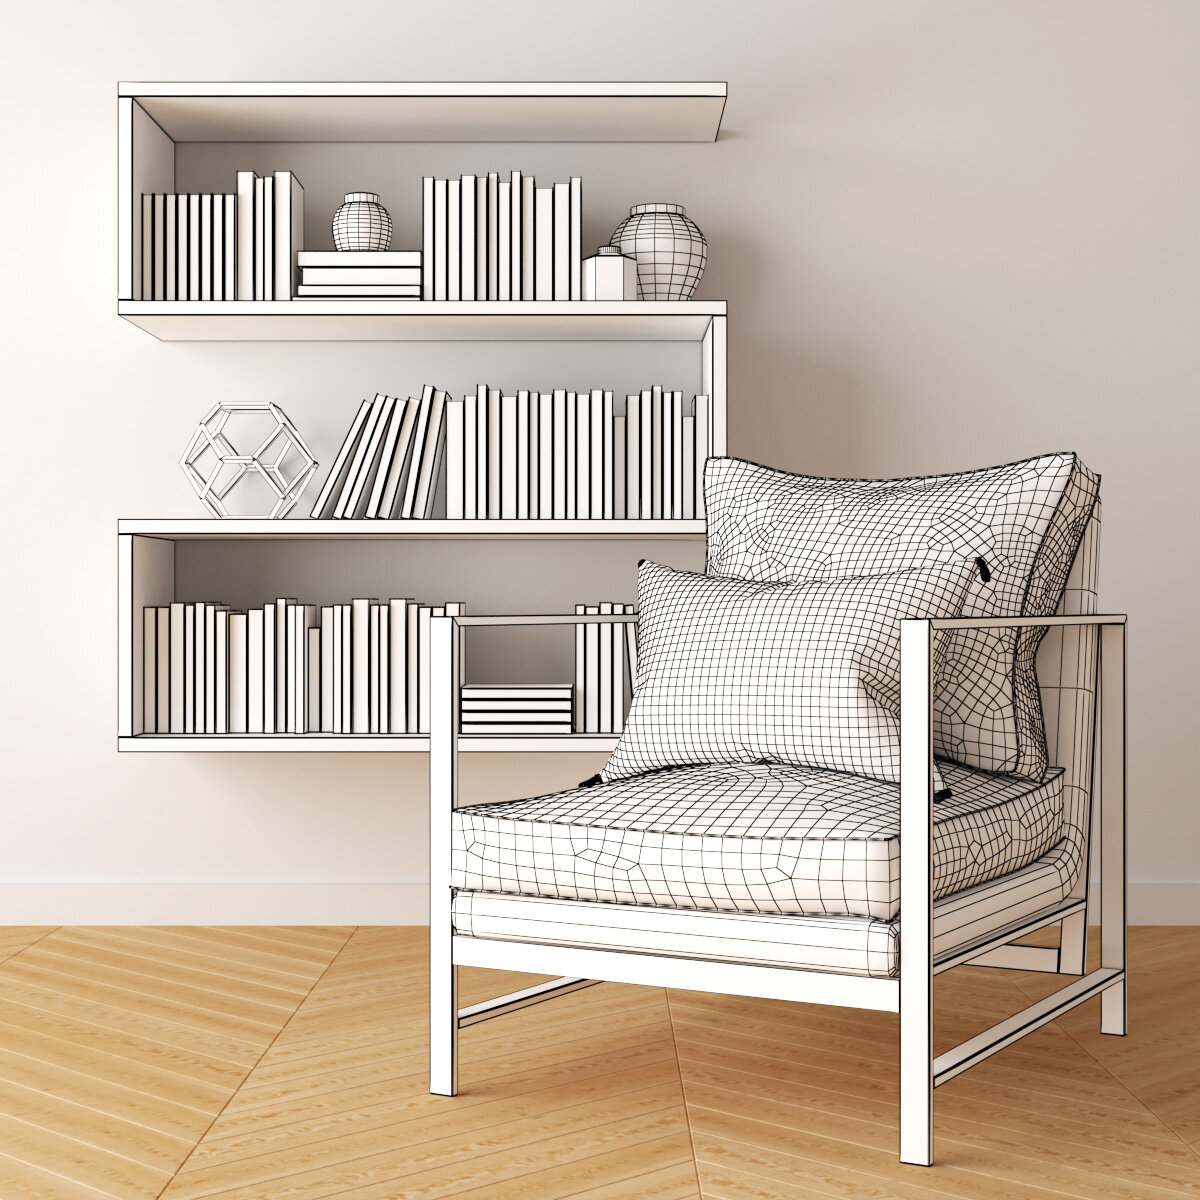
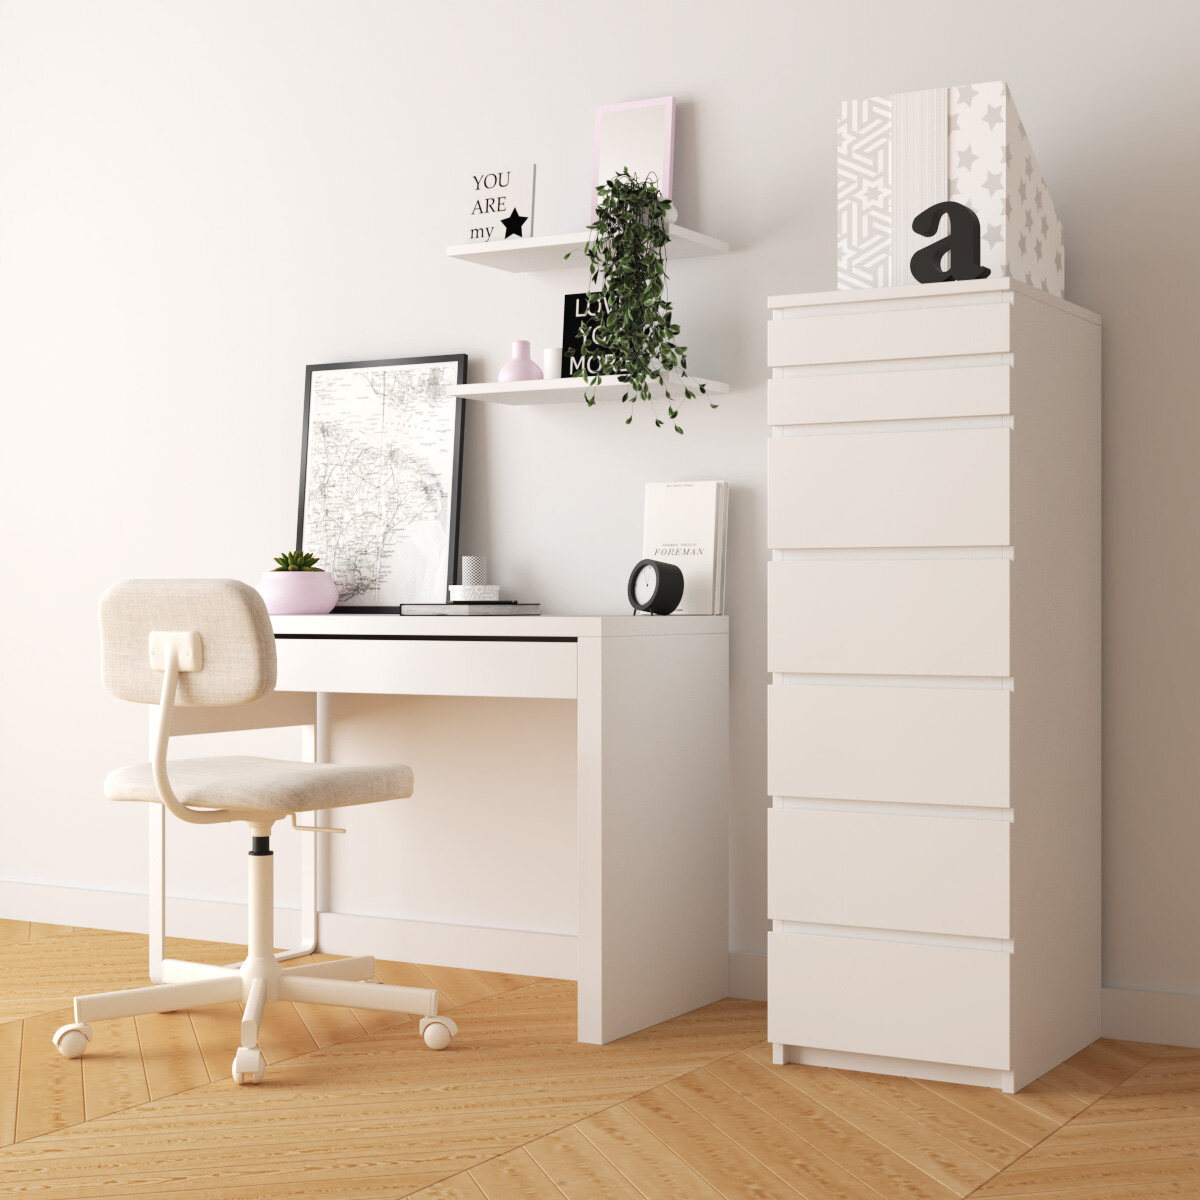
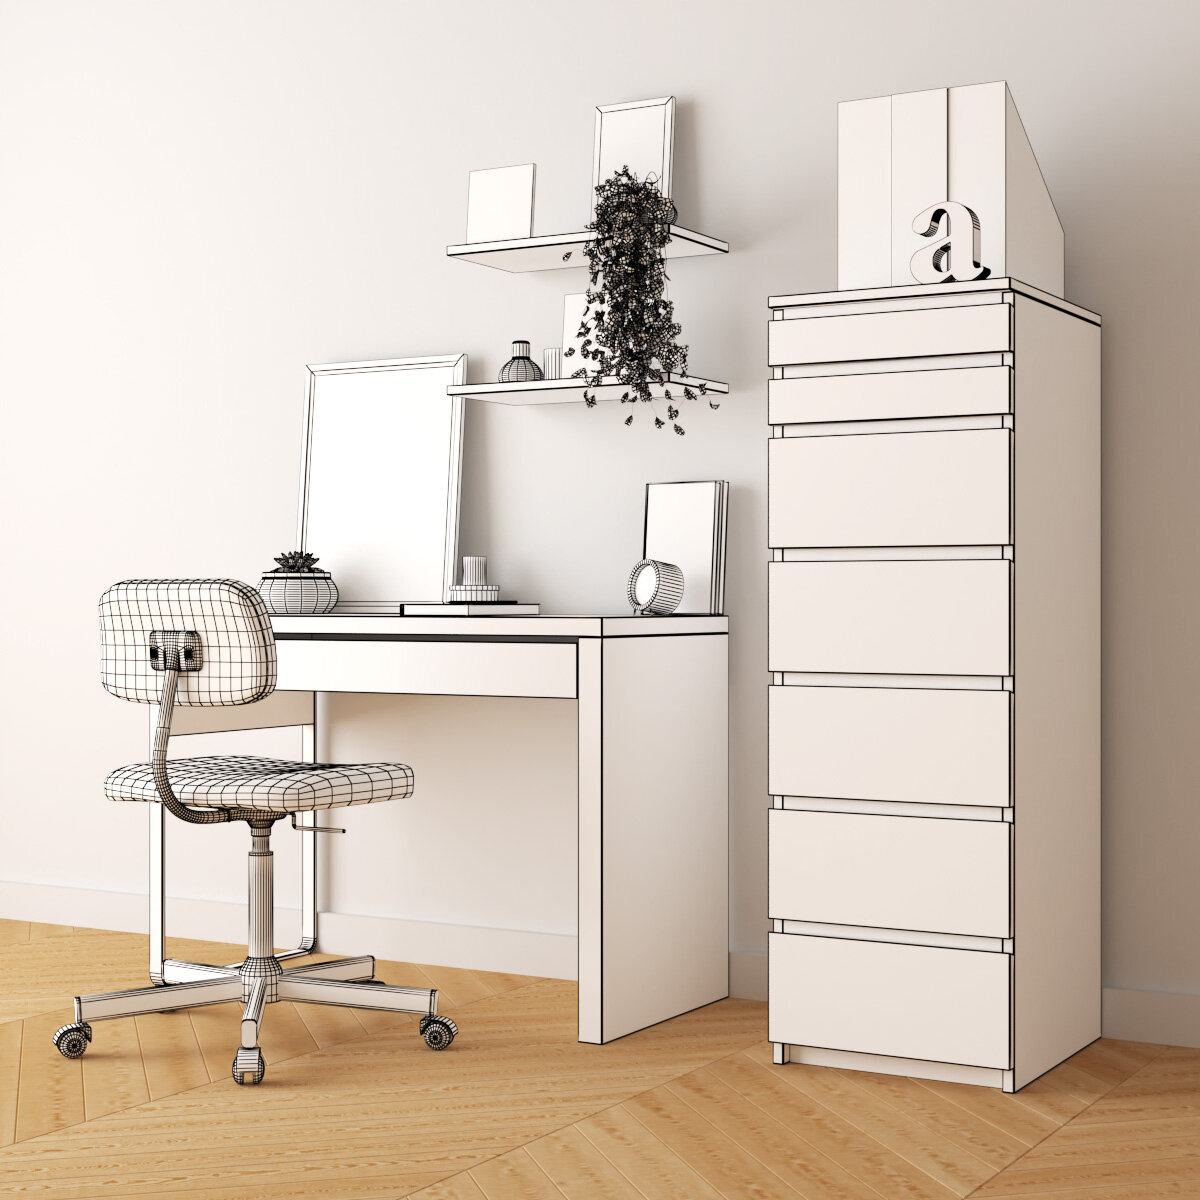
A collection of 3D furniture stock for Study Areas available for architectural design. My goal is to save artists time modelling furniture allowing them to focus on creating better photo-realistic environments.
Designed for Vray & Corona. There is also an option for Blender Cycles. These models are designed to be high quality while being low poly best suited for kit-bashing.
For a closer look at the technical details you can check out the link below: